Introduction
This is a comprehensive guide to being a Combat Technician for the USCM or any other human force in the galaxy. This guide includes discussions on engineering tools, construction, frontline combat and other relevant aspects of being a ComTech.
The contents of this guide are primarily relevant to ComTechs, however many of the concepts discussed can be relevant to Fireteam Leaders, Squad Leaders, any shipside engineering personnel, Synthetics and any Riflemen who take an Engineering pamphlet, as they all have the ability to perform engineering work.
If you are interested in my treatise on medical, please review the ‘Comprehensive Corpsman Guide’.

Who Am I
I go by the name Alan Bentway. However most of my experience in engineering is ascribed to my synthetic character, Nicholas. I’ve been playing SS13 and CM for well over a decade now, I know my way around a wrench.

I am become hammer, destroyer of walls
This Guides Purpose
I don’t want to see cades like this.
I just spawned, what do I do?
At the end of this guide I will detail a standard issue ComTech loadout that should leave you prepared for the round.
Appearance
Appearance
Unlike Corpsmen, your physical appearance is far less of a pressing concern. You are generally not going to be as high priority a target to take out compared to other Marine roles, and your default look is not too dissimilar looking to an average Rifleman. Furthermore, your more defensive oriented role means you’ll often be far less exposed to direct attacks. Thus feel free to go wild with your customization.
Squad Selection
Squad Selection
This is a major decision to make.
Bravo squad is almost always assigned as the ‘FOB’ squad, meaning they are charged with the construction, fortification and defense of the primary FOB, this meaning the forward operating base.
The FOB is always established at the primary landing zone. This is considered such an important job that it is not uncommon for commanders to pull ComTechs from other squads and order them to assist in setting up the FOB.
Alpha, Charlie and Delta squads are usually sent on the offensive, so if you are a member of those squads you can expect to be doing more frontline oriented engineering tasks.
Your Kit
Your Kit
Anything bolded is considered a strong or meta pick choice. Anything italicized is considered a weak or new player trap option. Anything with regular text is an acceptable choice but may be overshadowed by other items.
Standard Vendor
Everything here is issued for free, but you are limited in the amount you can take.
Armour
Armour inventory slots can be used to hold either more engineering tools, or weapon magazines.
- Light Armour: Only two inventory slots. Insufficient for our needs. Fast movement speed may be situationally useful if you are a frontline ComTech and need to go fast.
- Medium Armour: Three inventory slots. A strong pick, not too fast to move in, not too slow, decent protection. Usually the armour of choice.
- Heavy Armour: Three inventory slots and great defense, but you are crippled with terrible movement speed. You will be the first person to be picked off when a Queen screeches. May be useful for a Bravo ComTech who sits in the FOB all round.
Backpack
- Technician Satchel: Useless and a new player trap. Ignore
- Technician Backpack: Another new player trap. Can be situationally useful to carry extra engineering supplies, but don’t use this as your primary backpack.
- Machete Scabbard: Useless for ComTechs, ignore.
- Welder Backpack: Holds 1 less large item then a backpack, and has an internal fuel canister that holds 260 units of fuel, typically enough to last the average ComTech an entire round. Even with the restriction of having to take it off your back to quickly access items, you will find this is a very strong choice.
- Welder Satchel: Only holds 4 large items and has 100 units of fuel. This is a strong alternative pick, the ability to quickly grab items out of your backpack and have a fuel source is still attractive. However the smaller inventory size can be a point of concern, and the lower fuel storage means you will likely run out of fuel during the operation.
Belts
This is where some veteran players may disagree with me
- G8 Utility Pouch: A strong choice for most ComTechs. Holds 3 large items, clips to your belt or armour slot, I use it on the belt slot. Can be used to carry miscellaneous items such as metal, packed up sentry guns, entrenching tools, sandbags, etc, etc. You should combo this with a shotgun/magazine pouch for ammo storage, and if you do take it, consider putting your regular tools in a brown webbing or tool pouch. You do sacrifice ammo carrying capacity for this.
- Toolbelt: Holds your standard issue tools. This is the most commonly used belt option. Considering this holds 7 items, and your webbing can hold 5, plus the fact you rarely use your wires and multitool, means you can generally skip taking a toolbelt for either webbing or a tool pouch.
- Ammo Rig Belt: If you use a webbing or tool pouch to hold tools, you could take an ammo rig to hold additional ammo. You will sacrifice some inventory carrying capacity to achieve this, but this is a strong pick for a more offensive comtech.
- Shotgun Ammo Belt: Same as above, but for shotgun shells. Can be strong if combined with using a UBS for mass wall clearing.
- Other Belts: Either useless or too situational to use.
Pouch
- Construction Pouch: Meta pick. Holds up to three stacks of construction materials (metal, plasteel, sandbags) as well as wires and even the rare nailgun. Without this you will struggle to hold all your materials. Take one.
- Shotgun/Mag Pouch: You don’t have many places to store ammo. One of these pouches can be very strong for a ComTech and can free up other slots for more engineering tools.
- Tool Pouch: An alternative to webbing. This pouch can hold four items, one less than a brown webbing. What makes this attractive is that it is the only pouch or belt item that can hold a high-capacity industrial welding tool (the 80 unit welder), which is normally considered a large item and is usually placed in a backpack.
- First Aid Pouches: Not as critical to take as you usually won’t be taking as much damage as a Rifleman. But it can be worthwhile to vend some bandages/ointment/splints and hide them somewhere. You can also vend an Injector Pouch and stash the injectors in your helmet. You can vend some of these for free in your squad prep room.
- Other Pouches: Worthless or not useful for ComTechs.
Webbings
- Webbing: Holds 3 medium items. Only take this if you are using a tool pouch to hold your tools. Can hold your magazines.
- Brown/Black Webbing Vest: Holds 5 small items. Use this to hold your tools. Alternatively you can use this to hold other engineering items, C4, or any other combination of items (maybe three welding tools and some C4?)
- Drop Pouch: A weaker G8 pouch. Holds 2 large items. Not usually worth it for ComTechs but you could make it work.
- Shoulder Holster: Useless for ComTechs.
Handheld Defenses
Each ComTech gets to pick one of the four following options. If you lose it somehow, you are not getting a new one, so be careful.
-
Sentry Gun: Old faithful. Not great but not terrible. Middling damage output that is consistent. The issue with this sentry is that most xenos are not stupid and won’t stand around to get shot by the sentry, meaning its damage potential is low. Usually worth taking a Flamer sentry over this. The main strength of this sentry is using it to secure a flank or low traffic area.
-
Flamer Gun: This really hurts Xenos, and all its damage potential is upfront compared to the Sentry Gun. If a struck xeno is not smart (or panics) they may run just off screen and instantly drop and roll to put out the fire. Meaning you, or another Marine, may be able to chase them down for a kill. The main drawback to this weapon is its useless against Queens and Ravagers, and it has a low rate of fire so it may not be as effective against large hoards. This gun is also very effective at securing flanks.
-
Tesla Coil: Mostly a new player trap. Zaps xenos in close range. I find it to be functionally useless at stopping xenos. You may get lucky and slow down someone, but a Flamer can do the better, has greater range, and can actually kill them. The only advantage of the Tesla Coil is it is multi-directional, so it will attack targets from all angles, but its range is too short to take strong advantage of this. An upgraded Tesla is a better choice but costs resources.
-
Planted Flag: New player trap. Provides a focus order to any nearby Marines. It’s nice to have, but giving up a Flamer or Sentry gun is a huge ask.
-
Sentry Gun Upgrade Kit: Costs 15 points, lets you upgrade any of the above defenses into an alternative variant. Some upgrades are situational, some are terrible, but some are outstanding. You are giving up a lot of materials for this (it costs the same as 30 metal, 20 plasteel or almost a full stack of sandbags). Pick this if you are experienced and know what you are doing.
Generally speaking. The mini-sentry upgrades are a straight DPS upgrade over their default variant at the cost of slightly reduced range and higher ammo consumption (mini-flamer is top tier).
The Overlocked Tesla Coil is actually a decent item for deterring backliners and burrowers.
Equipment Rack
You have 45 points to spend here.
I’m going to be upfront. For most newer ComTechs, you are going to want to spend all of your points on a combination of Metal, Plasteel and Sandbags and nothing else. I’d suggest you get an extra 40 units of Metal (20 points), 20 units of Plasteel (14 points) and one stack of sandbags (10 points). This will max you out with construction materials, and use all of your points bar 1.
If you are going to take a Sentry upgrade kit (15 points), skimp a bit on the materials as you see fit. Plasteel is harder to get so you may be able to skimp on the metal or sandbags and try to scavenge more metal elsewhere. I’d only suggest taking a Sentry upgrade kit when you become more experienced.
Once you start getting even more experienced you can start experimenting with slightly alternative loadouts, but even then you still want most of your points going into mats.
Essential Equipment
- No reason to not take this. Comes with 50 Metal, 30 Plasteel, 25 units of sandbags, one C4, an entrenching tool, light replacer and high cap power cell. The light replacer is not important but everything else is critical to take.
Engineering Supplies
- Metal x10 (5pt): Critical. I’d suggest taking at least 40 units worth. You can never have enough metal, and you will always need more than you have.
- Plasteel x10 (7pt): Critical. Used to construct Plasteel cade entrances and R-walls. Almost as critical to get as metal and is rarer to be resupplied with due to its high cost. Highly suggested you get a minimum of 20 units worth.
- Sandbags x25 (10pt): An oft underused alternative to metal cades. Point for point a sandbag barricade costs the same to buy as a metal barricade. The advantage is sandbags can be placed extremely quickly, but they need to be prepared with sand beforehand. You usually want to grab an extra 25 units to get a full stack, but you could skip this in favor of more metal, especially if you are going to an operations zone with little sand.
- Plastic Explosive (3pt): Very useful, mostly for blowing up xeno tunnels or making new entry points, either through padlocks/obstacles you cannot deconstruct or quickly making a new breach area on the frontline. Can usually be acquired from Req in limited numbers. If you can afford it, an additional two C4 can be useful to bring.
- Breaching Charge (5pt): Situationally useful. Only used for breaching into areas, has a quicker setup and detonation timer and damages anyone on the other side of the wall only. The higher cost is slightly prohibitive. Small numbers can be acquired from Req.
- Airlock Card/APC Card/High Cap Cell: Important items but you can get them for free elsewhere.
- Welding Goggles (5pt): Useless for you. Your standard issue tech helmet comes with an inbuilt welding visor. The only people who need this are non-ComTechs and people who dislike the aesthetic of the tech helmet. Can be acquired elsewhere for free.
- Rangefinder/Laser Designation: Useful to have but not worth the high cost usually.
Explosives
- M20 Mine Box (18pt): Situationally useful if you know how to set them up effectively. Otherwise not worth the high cost.
- Everything Else: Useless for a ComTech and too expensive. Most items are worth 30 units of metal.
Special Ammo
- Too expensive for ComTechs, extended magazines are very useful for ComTechs due to getting more bullets per inventory slot, but the loss of precious metals is not worth it. Grab these magazines from your squad prep or requisitions if you need them.
Restricted Firearms
- M56D HMG (24pt): You can make better use of this than a Rifleman, however carrying the spare ammo can be difficult, and you will usually be better off focusing on constructing barricades. If you really want this, I’d suggest getting one from requisitions for free.
- Everything else: Everything else is either useless for a ComTech, too expensive or genuinely a bad item.
Utilities
- SensorMate Medical HUD (12pt): For a more offensive oriented ComTech this is a strong item, letting you quickly check the health status of any Marine you find, you can proactively evacuate wounded marines if you know they are in crit. The higher cost is the main drawback, but there is no where else you can get this item.
- M276 Pattern Combat Toolbelt Rig (15pt): A straight upgrade to the standard toolbelt. You only get 5 slots for tools but you can carry a pistol of choice. The pistol is a nice fallback weapon, but the drawback of losing the belt slot just to carry tools, and the very high cost of the belt, makes this a mediocre pick for a item that ultimately comes across as “nice to have”.
- Everything else here is either too expensive, too situational, can be found for free elsewhere or is useless for ComTechs.
Non-Standard Items
- Empty First Aid Kit: These are very good to get. They can hold a lot of small engineering supplies as well as additional medical supplies. Stash your high cap cells, wires, APC boards and similar inside this to free up space. Can also stash some bandages. You can find these in medical or in maintenance, no one will care if you empty out an oxygen deprivation kit.
Your Tools
You need all these tools to do your job, these following five are used very commonly.
Welder
Comes in several (useful) variants
- Welder: 20 units of fuel, standard issue, you wan’t to get a better version.
- Industrial Welder: 40 units. Uncommon issue. Must be acquired from a hacked autolathe, but are extremely worth it.
- High Cap Industrial Welder: 80 units. Large item (same size as metal). Can fit in a tool pouch, but otherwise it can only fit in a backpack. Unless using the pouch this is usually too big to take.
Extensively used. Commonly used to repair damaged barricades and walls, repair damaged equipment and weld doors shut or open. You must wear welding protection when using this or you will suffer eye damage.
It is not a bad idea for you to carry additional welders in your kit if you can spare the space, especially if you are using a welder satchel bag.
Wrench
Used to move barricades or deconstruct equipment. Also used in repairing certain items.
Screwdriver
Used to move barricades, open and hack APCs or vendors and other general tasks
Crowbar
Used to pry open unpowered doors. Deconstruct or construct equipment.
Wirecutters
Used to remove barbed wire, hack doors and deconstruct certain equipment
Non-Standard Tools
List of tools that are not commonly issued to ComTechs but you might find.
Nailgun
A civilian sector repair tool. Not issued to military forces under normal circumstances. The USCM synthetic can issue themselves with this as an optional tool.
You can only find this on certain maps, typically inside engineering sectors. A nailgun is loaded with a nail magazine. If it is loaded, you can use it to repair a metal or plasteel barricade, the repair is performed significantly faster than repairing a cade normally. However you need to hold either metal or plasteel in your off-hand when doing this, as the nailgun will consume 1 unit of these to repair a cade (metal for regular cades, plasteel for the plasteel cades).
This might seem like a waste of resources. However the biggest benefit to the nailgun is that it can repair a barricade that is beyond the ability to repair with a welding tool. Normally when a barricade is at this point you need to deconstruct and replace it. (optimally you repair the cade once with the nailgun, then you can finish repairs with a welder).
Being able to spend 1 unit of metal to repair a barricade that would’ve cost 4 to 8 sheets of metal/plasteel to replace is a massive saving.
The nailgun itself is a large item so it only fits in your backpack or armour slot (or construction pouch). If you can spare the inventory space its worth taking this if you find it.
Weapon
Almost all Marine guns are viable in combat. Unlike Corpsman, a ComTechs weapon selection is far more akin to a regular Rifleman, as ComTechs can fill in for either an offensive or defensive posture.
You are still a valuable Marine, and I would discourage dangerous ‘pointman’ style loadouts.
Furthermore, you can often afford to carry far more ammo into battle than other support roles, so you can sustain engagements in combat for just as long as any Rifleman.
Underbarrel Shotgun
Not a primary weapon but an attachment, this warrants its own slot. You can attach this to a M41A.
As an offensive weapon it is mediocre, it deals less damage than conventional buckshot and is mostly useful for stunning. However, it is extremely effective at blasting through doors and walls.
1 shot will destroy a door
5 shots will destroy a regular wall and girder
10 shots will destroy a reinforced wall and girder
Assuming you have a plentiful supply of buckshot ammo, you can use this attachment to rapidly clear out large segments of walls and doors to open up lanes of fire. This can be done far quicker than you can deconstruct, but you lose out on the metal recovery from deconstructing the wall normally.
Underbarrel Flamer
Your alternative attachment. People’s opinion of this ranges from its great to its terrible.
Struggles to kill most targets (though I’ve heard of robust riflemen killing Predators with it)
Its main strength for a ComTech is you can refill this with your welder fuel, and it makes an effective weed/vine clearer. It can also help force a xeno to disengage if you set them on fire.
M41A Mk2
Attach Recommendation
- (Offensive) Magnetic Harness / A-Grip (or UBS/UBF) / Extended Barrel
- (Defensive) S4 Scope / UBS or UBF / Extended Barrel or Bayonet
Standard issue rifle, good damage output and spare ammo is usually plentiful to find. Ammo management is acceptable due to decent ammo size. Preference to finding extended magazines with one or two spare AP mags for Defenders/Crushers.
You have two real weapon setups.
- Defensive: Use a scope. The scope will let you plink away at distant ranged xenos/boilers and make it slightly harder for them to harass you. You sacrifice offensive utility for this.
- Offensive: Use a magnetic harness. You’ll be better able to resist being disarmed of your weapon and be safer in pushing out, but less so than with a shotgun.
I would suggest taking either a UBS or a underbarrel flamer at your discretion. However an a-grip is better for an offensive oriented ComTech.
M41A Mk1
Attach Recommendation
- Magnetic Harness / UBS / Bayonet
Simply a M41A Mk2 but less attachment options but more ammo. Less effective as a chaser due to lack of a-grip, but massive ammo pool is a big bonus. Main downside is you need to get into the req queue to get it.
Can only use either a UGL or a UBS. So take the UBS unless you source grenades from elsewhere.
If possible, try to secure one AP mag, they are in very low supply however.
M37 Shotgun
Attach Recommendation
- (Standard) Magnetic Harness / A-Grip / Bayonet
If you take this with a magnetic harness, you’ll prove very hard to pin down against T1s and some T2s. Great for CQC, but the weapon struggles against T2s and T3s if using buckshot, and the shotgun is less effective at clearing walls than the UBS.
Flechette rounds are far more effective against T3 and some T2 xenos, but you will lack stunning. If your greatest threat is backliners harassing you, then buckshot is far more viable.
M4RA Rifle
- (Chaser) Magnetic Harness or Rail Light / A-Grip / Extended Barrel (optional)
- (Defensive) S4 Scope / Laser Sight / Extended Barrel or Bayonet
- (Support) B8 Smart Scope / Laser Sight / Extended Barrel
If you really hate boilers or like chasing, this is for you. Take the scope to better harass xenos, or provide support fire from the safety of your cades. This can also be a great chaser weapon if you combo it with a flamer turret and light armour.
The B8 scope can turn this into a support weapon at the cost of a lower ROF and damage. Good for Corpsman, maybe less for ComTechs.
The lower bullet count per magazines means you’ll have less sustain power than with a regular rifle. Try to pack at least one AP mag for Crushers/Defenders.
Less used tools
Still important to carry, but you don’t need these to be as readily accessible as your other tools.
Multitool
Uncommonly used item. Mostly for temporarily hacking doors/equipment or activating the tele-comms array.
Wires
Uncommonly used item. Used in repairing APCs, come uncommon construction and repairing Synthetics.
Pre-Drop Checklist
Pre-Drop Checklist
After gearing up at your prep room. You want to head down to the hanger and head to the southern Engineering storage. You have access to this room.

WARNING: From this point on your actions are technically in breach of Marine Law. If you are found by the Military Police, they may be able to press charges against you. Do this at your own risk.
The autolathe (red) can be hacked to vend High-Capacity Welders. These are significantly more useful than your normal issue welders and can fit in small places. Get as many of these as you want.
For “some” reason the next three machines are unique in that they are specially locked so ComTechs cannot access them, even though every other machine of the same type in the entire game is not locked off to ComTechs. Ergo you will need to hack these machines.
You can hack the right-side Electronics Vendor (orange) to get some high-cap cells and APC circuit boards. The tool storage machine (green) can vend additional tools and an industrial high cap welder, the 80 unit welder that can only fit in a tool pouch or backpack. The component vendor next to the Autolathe is only useful for building machines and thus is less useful for you.
There is another area in the hanger you can get some tools from, the northern workshop.

This area starts closed off, but it is usually kept open by the pilots. What is interesting is that the vendor machines in here are not access locked to ComTechs, ergo you can grab the ancillary tools here without needing to hack a machine.
Extra Tasks Post Prep
ComTech prep times are generally shorter than other support roles like Corpsman (outside of standing in the req line if you want extra gear). Ergo you generally may find yourself with plenty of spare time and little to do, anywhere from an extra 10 to 15 minutes or more.
Of course, you could go join Charlie breakfast and eat the hot sauce.
But with a little bit of elbow grease, you could choose to spend your free time preparing supplies for the operation, making boxes of ammo and magazines as well as bags of supplies. You could also trawl through maintenance and scavenge for metal. You could also break into Engineering and steal their spare emergency metal and plasteel supply (this is a joke; the metal will already be taken by the CE and you’ll be arrested by the MPs).
Making Supplies

I prepared all this in exactly 7 minutes of round start, including after I had fully equipped myself for the operation.
With the 10-to-15-minute time limit you can easily prepare one or more resupply crates for your squad or the FOB.
First you need a crate. If you quickly duck into maintenance, you can crowbar open some wooden crates and scavenge the wood, you need 5 units of wood for 1 wooden crate.
Each crate can hold up to 10 items.
You want to fill the crate with useful items, some examples are below.
- Bullet/Ammo Boxes: You can create ammo boxes by vending a shotgun ammo box, emptying it, and then clicking it to turn it into cardboard, then turn the cardboard into a ammo box of your choice.
- Pro-Tip: You can quickly fill a bullet/shell box by taking a rifle magazine/shotgun shell box, switching to harm intent, and clicking on the box, this will automatically transfer the bullets/shells into the box
- Spare Rifles: A few spare M41A rifles with a pre-loaded magazine can make a huge difference. If you have time, toss some basic light attachments on.
- Backpacks with items: Generally, fill these with flares, maybe some MREs. You should use the labeller (outside of the Smartgunners room) to denote what is inside the pack. You can also grab spare welder-backpacks from your squad vendor for fuel resupply groundside.
Generally speaking, a crate with about 3 rifle bullet boxes, 2 buckshot boxes, 1 flechette box, 2 bags of flares and 2 spare M41A rifles is a good setup.
You can easily prepare one of these crates fairly quickly, depending on your speed. Dragging it to the dropship can be somewhat time consuming, but you were going to head that way eventually.
Scavenging Metal Shipside
You always need more metal. You could be proactive regarding this.
You can’t really deconstruct walls around the Almayer, as although these will produce 2 metal each, you’ll quickly end up being arrested by the MPs if you are found.
Maintenance and “fluff” areas of the ship are filled with tons of “useless” metal canisters. Each of these canisters can be instantly deconstructed with a crowbar which will produce 2 units of metal. A quick trip into maintenance could produce an entire stack of 50 units of metal if you put in the effort.
The major counterpoint to this, is that you may not be the only one doing this. So, you may run out of metal opportunities.
Standard Engineering Tasks
Engi Tasks
Comms Duty
Repairing the colony communications array is one of your more important tasks, lest you die in the dark.
Repairing the actual array is simple, click it with a welder until its fixed.
Repairing the APC is a different issue. If the APC is only slashed, you can wirecut it to fix it. If the APC is destroyed (only T3s or explosives do this) then you need to replace the APC with a fresh one. This is why you bring some APC boards and power cells.
To repair the APC.
- Crowbar open the APC, take out the power cell
- Crowbar the tile in front of the APC to remove the floor
- Screwdrive the APC
- Wirecut the APC
- Crowbar the APC
- Build an APC frame then click the broken APC with the new one
- Use wires on the APC
- Put in the APC board
- Screwdrive the APC
- Put in a power cell
- Crowbar the APC
The APC is fixed.
You may not be able to actually turn on the APC so you will need to screwdrive the APC, wirecut the Access Restrictions, then turn on the APC.
Rotating Cades
Sometimes when you are moving or replacing cades you need to change their direction. Instead of moving the cade and trying to push it the right way, you can just right-click the tile and select the “turn clockwise” button, this will rotate the barricade on the spot.
Replacing Frontline Cades
Shamelessly stealing from the wiki. Generally, when you repair frontline cades that are too damaged to repair, you want to build the replacement cade away from the frontline and then move the cade physically to the breach.


The only exception to this is if you are a Synthetic (who builds very quickly) or you are using sandbags which go up faster. Even in these scenarios it’s still safer to use the aforementioned method.
Barricades
Cades
Any barricade without barbed wire is only 50% complete - *Ancient proverb, and words of wisdom. *
Barbed Wire
Cost - 1 Metal
PLACE BARBED WIRE ON EVERY BARRICADE YOU BUILD!
Barbed wire confers two benefits to any barricade they are built on. Anyone meleeing the cade will take damage, and no one can pounce or climb over the cade. This means anyone trying to break a cade has to disengage to heal, and it prevents Runners or Lurkers from jumping over and killing you.
The only time you won’t put barbed wire down is if you lack the metal, its usually better to completely cover a frontline area and have no wire than leave it half open.
In the rare scenario someone is trying to retreat and there is no entrance, you can use wire cutters to remove the barbed wire to let someone climb over.
Sandbag Wall

Cost - 5 Sandbags
Roughly comparable to a metal barricade. The chief advantage of the sandbag is that it can be placed down almost instantly, making it an effective frontline alternative.
The chief disadvantages are that you can only repair a sandbag wall with other sandbags, meaning there is a limit to how long you can sustain these walls against attacks. Furthermore, you need to prepare the sandbags in advance by filling empty sandbags with sand, and sandbags filled with sand can’t be placed inside your backpack or any other storage device.
Metal Barricade

Cost - 4 Metal (5 + Wire)
Standard issue barricade. Use it everywhere and anywhere. These cades can be upgraded into one of three alternative variants when you apply 2 metal to the cade.
Acid Resistant Cade

Provides 50% resistance to acid attacks. This is the most commonly used cade upgrade, as ranged attackers can more freely hit cades, this upgrade makes that far less effective. It also helps resist being melted and struck by boiler acid attacks.
Brute Resistant Cade

Provides 50% resistance to slashing and melee attacks. Not as common as acid resistance, but if the xeno forces has shown itself to be deficient in boilers and spitters then this is a very strong upgrade. If the enemy is throwing endless Ravagers at you, this will slow them down.
Explosive Resistant Cade

Useless. Provides resistance to explosive attacks and reduces the amount of damage that bullets/flames deal to the cade. You are fighting xenos, not humans, and even in HvH these barricades are useless since bullets usually miss the cade and strike the poor human sitting behind it.
Metal Folding Barricade

Cost - 6 Metal (7 + wire)
Essentially a metal barricade that folds like a Plasteel Barricade. Its best to use these in rearline areas, places with no expected xeno traffic or when you run out of plasteel. Has roughly the same level of resistance as a metal cade but you cannot upgrade it.
Plasteel Barricade
Cost - 8 Plasteel
Has roughly twice the strength of a metal barricade and it flips down providing an entrance or exit. Extremely powerful but plasteel is highly expensive and thus rare. Only use these around frontlines where enemy contact is expected.
Fortification Theory and Practice
Fortification Theory and Practice
In order to comprehend how fortifications work you need to understand your opponent and how they can attack or bypass you. Per this consideration, this section will assume that your opponent will be xenomorphs. There will be a smaller section discussing Human versus Human theory.
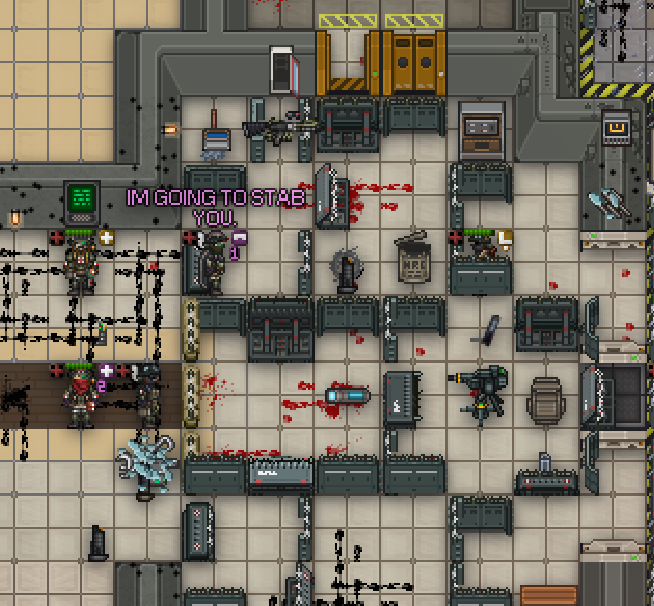
A quiz
I want you to look at this image and tell me what is wrong with it (it is an older image)

I likely missed a lot but here’s what I noticed.

Now, we can discuss good practice.
Compartmentalization
The concept of compartmentalization is that you section off areas of a fortification so that if one area is breached or overrun then you still have the rest of the fort to defend instead of risking the entire area being overrun.
The advantages are obvious, your fort can hold out for far longer and you have a chance to reclaim an overrun area when the xenos have to retreat.
You have to take into strong consideration several factors, specifically your compartments need to be large enough that marines can move around freely. Tiny 3x3 boxes are death traps for boilers and give you no room to move or fire.
Counterpoint, compartments are only useful at FOBs or very static frontlines, if the xenos can outflank your Fort Kickass then the fort was a waste of metal.
Door Placement
The placement of folding barricades (of either type) is a simple yet oft unlearned critical skill.
Plasteel vs Metal Folding Cades
Firstly, when it comes to deciding to use Plasteel or Metal folding cades. A rule of thumb is Plasteel Cades should be placed on the frontlines or where heavy enemy contact is expected, and Metal Cades should be placed in rear line areas or as internal doors inside a barricade.
A plasteel cade has roughly twice the amount of health as a metal folding cade thus it can withstand a lot more punishment.
How many doors?
The number of folding doors you should use should be based on how high traffic you expect the area to experience.
- 1 Folding door = 1 to 3 people coming at a time, rear line area
- 2 Folding doors = 5 to 8 people coming in at a time.
- 3 Folding doors = Unlimited amount of people
A single door tile cannot handle a mass surge of Marines rushing in. Comparatively 3 tile doors can handle a virtually unlimited number of Marines rushing through. Your only real limiting factor is the higher metal or plasteel cost of using extra doors, but the extra cost could save lives, or at least be more convenient to marines moving through.
You can somewhat mitigate the need to use 2 folding doors if you place a regular amount of 1 tile folding doors along a cade line, thus offering marines more entrance zones and the ability to avoid a traffic jam.
Placing The Door

You almost always want to place cade entrances to the sides of the barricades. Putting entrances in the middle of a cade line is a recipe for disaster as this will result in marines pushing each other to get through, and it will block lines of fire.


Left is ideal. Right is terrible.
Lining Up Entrances
You want to ensure your cade entrances are all lined up with each other. This ensures Marines don’t need to constantly change their direction and they can just run straight. This also helps during a mass charge or a retreat.

Defensive Lines
Cade Placement
Taking into consideration that Xenos need to approach into melee range to attack a cade line, you want to set up the cades in such a manner that you force them into the open. Never build your cades in such a manner that a xenos can attack it while being in cover, as shown.


In this example, you want to pull back the cades so the attackers are forced into the open.
Cade Depth
In most circumstances you want to ensure a minimum of 3 tiles of distance between two cade lines. If your cade lines are too cramped you leave the Marines extremely vulnerable to boiler attacks, which can easily cover a smaller cade line.
By keeping 3 tiles of length, you give Marines plenty of room to move, set up gun emplacements and fall back if there is a breach or an acid boiler strikes.
Deny The Enemy Cover
Xenos live and die by their ability to take cover and hide from bullets. When constructing favorable frontline or FOB fighting conditions you want to maximize Marine cover while minimizing Xeno cover.
Observe your battlefield, think where you would be going if you were attacking your fortifications. Then look to find ways to eliminate or reduce the strength of that cover.
Generally speaking, the more open ground a xeno has to cross to reach the marines represents more time for gunfire to be brought to bear and to damage them, or even kill them.
In the example below we see a standard cade line that grants the xenos a way to take cover and hide from line of sight. But if the smart ComTech removes the southward facing wall then they somewhat expose xenos to sightlines.


However, a ComTech with free time might be able to further open up these sightlines to further deny the enemy cover.

Of course, this is a time-consuming strategy, so this may only be viable around the FOB or during a stale-mated frontline. Or if you have a lot of buckshot ammo and a UBS.
Directional Cade Corners
When fighting aliens who are approaching from odd angles (southeast, northeast, ect) you need to be aware of firing lanes. If you build a standard box fortification as below, you run the risk of causing marine friendly fire as the layout of the cades plus the angle of enemy attack makes it inevitable marines will strike friendlies.

Ergo if you set up corners in these areas you force Marines to move into an area where they won’t shoot each other, or at least are far less likely to.

Although in these areas it’s usually better to build inwards. But if you find a pre-built cade line in this state, you can do this strategy in a pinch.
Inward Only
When constructing frontline cades, especially at odd checkpoints, it is always best to set up in such a way that the cades are pulled inwards towards the marines. As noted, it’s better to force the xenos to come closer AND to maximize marine firepower.
As shown below, inward facing cades allow more marines to man the cades and focus fire, while also forcing xenos to cross more open ground to attack the barricades. This also reduces the risk of marine friendly fire.

Furthermore, this form of cades can make it harder for Boilers to get a good angle, or whatever angle they get forces them to make a sub-optimal attack and force them to come closer to the front to fire, making them vulnerable to damage.
Medic Heal Boxes
Corpsmen need to recover dead marines, and on hectic frontlines a safe zone can be hard to find. Setting up small rear-line safe areas for people to be dragged towards and healed could help give your corpsman some relief. The bigger the box the more metal you will need, you could try to place the safe zone adjacent to a wall or rock formation to save on metal.

Not a good defensive location, but decent to protect and support Marines doing healing work.
You do not necessarily need to close off these healing zones (especially if metal is tight). Even a few barbed wire cades around a rough box area can be sufficient to deter Lurkers and Runners in the rearline and give corpsmen some breathing room.

It all comes down to how much metal you have and how much time you have to build it.
Non-Enclosed Defensive Line
Generally, you want barricades to be enclosed structures with no open entrance for an intruder to enter. However, there are circumstances where this may not be viable, or unnecessary.
A straight line of defensive barricades at or near the frontline, even without barbed wire, can be a useful tool to slow a charging group of xenos. If attacking xenos are forced to stop or move around a line of cades, it will slow down an offensive which may give marines the breathing room they need to counterattack, or sufficiently slow the xenos that they may withdraw due to losing momentum.

This is especially useful in large, flat, areas with no cover or buildings to exploit. While you could construct a massive frontline cade, this would require many ComTechs and hundreds or thousands of units of metal. A quick defensive line is quicker and cheaper to set up.
Human vs Human
Human vs human events are fairly uncommon with combat being fast paced and highly lethal, ergo ComTechs have to approach these situations from a different perspective. There is one sentence that explains the critical difference.
“Any cover that does not 100% block bullets is useless”
Barricades are a new player trap in HvH, they have an RNG chance to block bullets, so it’s better than nothing, but you leave yourself highly vulnerable to just getting shot and killed through cover. The only true guarantor of survival is a physical wall that has a 100% chance to block bullets.
If you have absolutely no choice, some barricades are better than nothing. But the mobile enemy can just flank your position, or use mortars, or grenades, or snipers.
As a ComTech during HvH you will generally be focusing more on your ability to breach into areas than constructing elaborate barricades (and dying instantly). If you do need to build defences, it may be more worthwhile to just build a wall (or r-wall).
Scavenging
Scav Run
Scavenging separates the good ComTechs from the great ones.
You cannot always rely on Requisitions to provide you with all your metal needs. If you want to be the best ComTech you can be, you will need to learn how to scavenge and scalp metal from the operations zone. Most items can be deconstructed, some quicker than others.
Do you see this building on Chances Claim?

I see a minimum of 183 units of metal. Some easier to grab than others admittedly.
THE AUTOLATHE
Many items can be fed into the autolathe to double the amount of metal you receive. Generally, this is items like metal rods or table parts.
Not all maps feature an autolathe, and some autolathes may be out of the way. However, it is possible for an autolathe to be constructed, generally however this is only something either a Maintenance Tech, Chief Engineer or Synthetic can do as they have access to autolathe boards and construction materials on the Almayer.
Metal Rods
About 4 units of metal rods can be smelted with a welder into 1 unit of metal. You can stack up to 60 units of metal rods. A single stack of rods can be smelted into approximately 15 units of metal.
Metal rods are often recovered when deconstructing certain objects, mostly reinforced walls. However, if a wire fence is deconstructed (with wire cutters) it will yield 10 units of metal rods. Many maps (but not all) feature large amounts of metal fences that you can deconstruct and smelt for extra metal for only a moderate amount of effort.
HOWEVER:If you take the metal rods and feed them into an autolathe, you will double your metal output. Thus 4 metal rods becomes 2 metal, and a stack of 60 rods will give you 30 units of metal instead of 15. Furthermore, you save on welder fuel.
If you go on a scavenger hunt, successfully fill a backpack with metal rods, you can easily produce almost 200 units of metal.
Walls
Most walls can be deconstructed. The actual wall itself yields no metal, it is the girder itself that does. If you deconstruct the girder properly, you will be rewarded with 4 units of metal, irrespective if the wall is a regular or reinforced wall (no plasteel is rewarded for deconstructing a r-wall).
Destroying a girder with gunfire won’t yield any metal, but it will remove it faster.
This is a very slow method to acquire metal, and generally you should only remove walls if either you are doing so to open up firing lanes for combat, expand the FOB or breach into areas to flank or attack the enemy. However desperate times do call for desperate measures.
Window Frames
Windows frames can be very quickly deconstructed with a wrench to yield 2 sheets of metal. These frames represent a good source of metal as they are usually plentiful and are very quick to deconstruct, furthermore doing so may actually open up movement lanes for you and your fellow marines.
Chairs/Tables/Rack
Hit these with a wrench to get back 1 unit of metal, twice for racks and tables, you need to be on harm intent to deconstruct a rack and table. You can put a table or rack in the autolathe to get 2 units of metal but this is very time consuming as you can’t stack them.
Machines
Deconstruct for 5 units of metal. Not all objects in the environment can be deconstructed however (usually food vendors).
Doors
Deconstruct for 5 units of metal. Only single tile doors can be deconstructed.
Post OB/CAS
OB and CAS strikes on urban structures can be an unintentional source of metal, especially if the OB was a cluster round. These high explosive attacks will typically destroy large swathes of structures that will leave metal sheets laying around.
After a strike, and if the area is secure, you can swoop in and scavenge leftover metal sheets that are often left strewn around. You could easily scavenge half a stack or even a full stack of sheets if the area struck was particularly built up beforehand.
Loadout
Loadout

My more offensive oriented ComTech loadout. Lots of ammo.

One of my defensive ComTech loadouts. Plenty of spare room for more metal carrying.
I literally just spawned and need a kit fast!
A quick setup guide
- Go to your engineering prep room. Get your standard kit, Medium armour, welder-satchel, a toolbelt, magazine pouch and a construction pouch.
- Get your essential kit. Put the metal/plasteel and put it in your construction pouch, put the C4 in your webbing, put everything else in your satchel.
- Buy the 10x metal stack 4 times, buy the 10x plasteel stack 2 times, buy the 25x sandbag stack 1 time. Vend a Sentry Gun of your choice (my pref is flamer).
- Go to the tool vendor, vend at least 2 additional welders and put it in your webbing.
- Go grab a gun from your prep room.
That is it. You have a basic ComTech kit, no fuss, and are ready to go. Follow my earlier instructions on other tasks you can perform.
Extra Notes
Extra Note
Synthetic

You don’t need to use welding goggles. You build things faster than humans and you deconstruct things faster. You can build an autolathe (do it).
If you get the breaching hammer, remember to only break the wall, you can decon the grider for the free metal. It’s only worthwhile to use the hammer to break the girder if you are in a rush.
The compact nailgun is very useful, consider getting it.
Don’t forget that when you return to playing a fleshling, you do need to wear welding goggles.
Conclusion
I once said a Corpsman is one of the oft una unappreciated and overworked backbones of the Marine force. This extends equally towards ComTechs. You can’t live without a corpsman, but you certainly can’t fight without a comtech giving you cover to exploit.
Have fun and take a break once in a while.
Every Engineer main is a temporarily embarrassed Specialist main