LTNTS' / Vyzo's Guide to Defense in Depth

Opening Statement

You’ve probably realized by now that your average combat technician is incapable of building a proper defensive Forward Operating Base (FOB).

If they do, it can barely hold for longer than 20-30 minutes against a competent and capable enemy force.

This guide aims to address this issue by bringing you up to speed on the concept of “Defense in Depth”, a military strategy utilized to this day.

There will be one or two military terms; look it up if you don’t know it. It will also utilize some relevant concepts and principles from the dated wiki guide.

What is Defense in Depth?

[1] a tactical system of mutually supporting positions that are each capable of all-round defense and that have sufficient depth to prevent the enemy from achieving freedom of maneuver before the enemy’s attack is broken up and absorbed

[2] a strategic succession of defended areas which will permit continuation of a war after forward areas have been lost

Thank you, Merriam-Webster

How do we achieve Defense in Depth on CM13?

I’m glad you asked. It is quite easy to achieve this in a 2d spaceman game, with no “real” terrain considerations. If you use your points wisely, requisitions prove competent, have good squadmates, and salvage resources from the colony where possible, then this is very easily achievable.

Your only real enemy would be Command, if they don’t give you enough Combat Technicians or majorly screw up the first push[1]. And the xenos themselves.

Sectional Defense

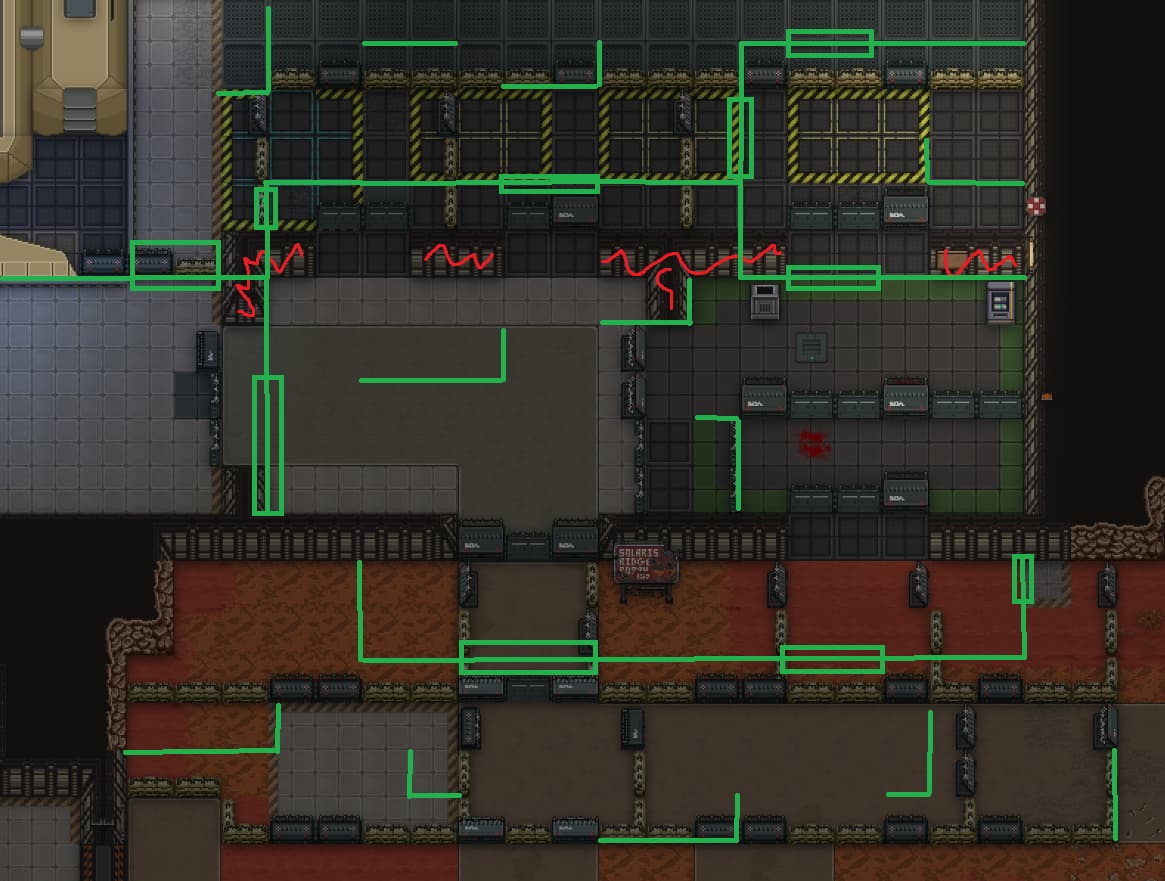
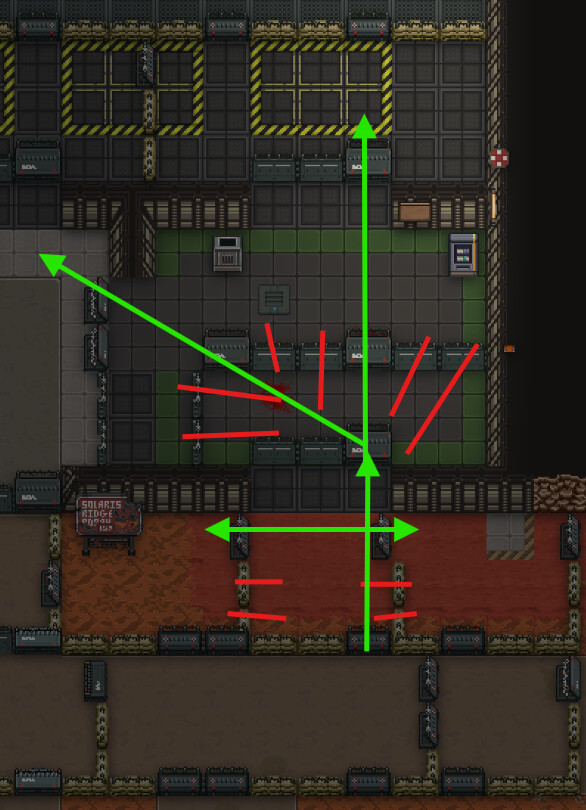
Our first concept and principle is Sectional Defense, where we will utilize positions capable of DAMROD[2], specifically “Depth, All-round Defense, & Mutual Support” or DAM for short.

In the picture below, you will see Sectional Defense. Where we divide several areas into smaller ones to ensure the integrity of the FOB and limit the enemy’s capacity of breaking in.

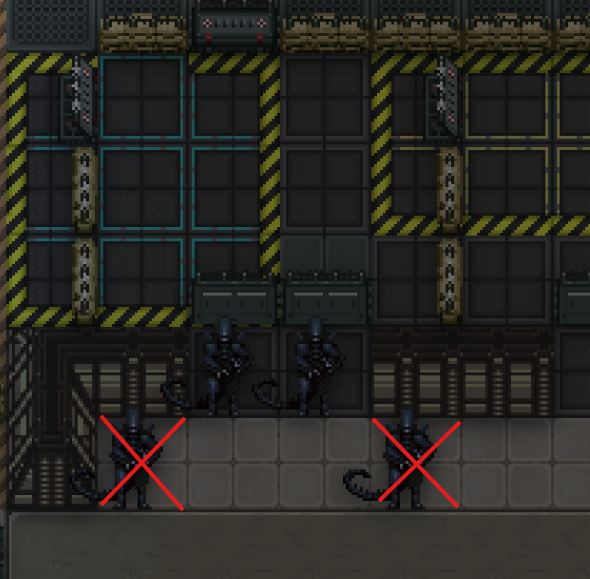
An example of ensuring FOB integrity and security can be seen below. Where you can see that we’ve lost two sections of the FOB, but xenos have not compromised the rest of the FOBSEC[3].

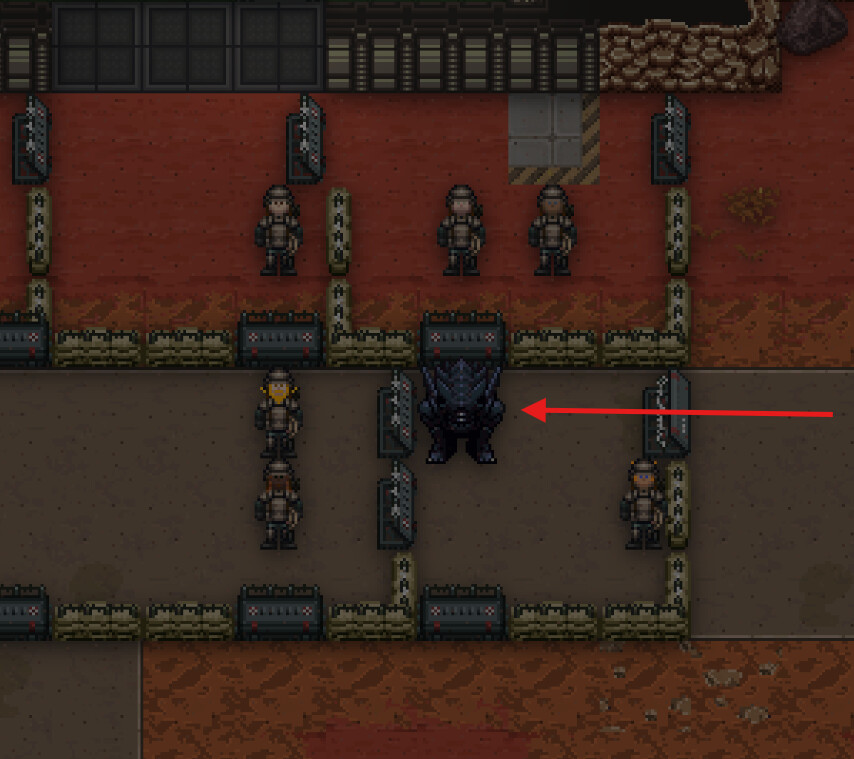
Here is another example of a crusher trying to destroy the plasteel cade, only to end up locked in by the private. Now they’re trapped and getting shot at from multiple locations. This is called Mutual Support, where nearby positions can support other friendly positions.

You can utilize Sectional Defense to divide & conquer by splitting up some advance paths, making it inconvenient and time-consuming for the enemy to go around. If one enemy is critical on one side, then their friend would need to go around to help them, buying you time to kill their friend before they get there.

Clear Pathways & Lines of Fire

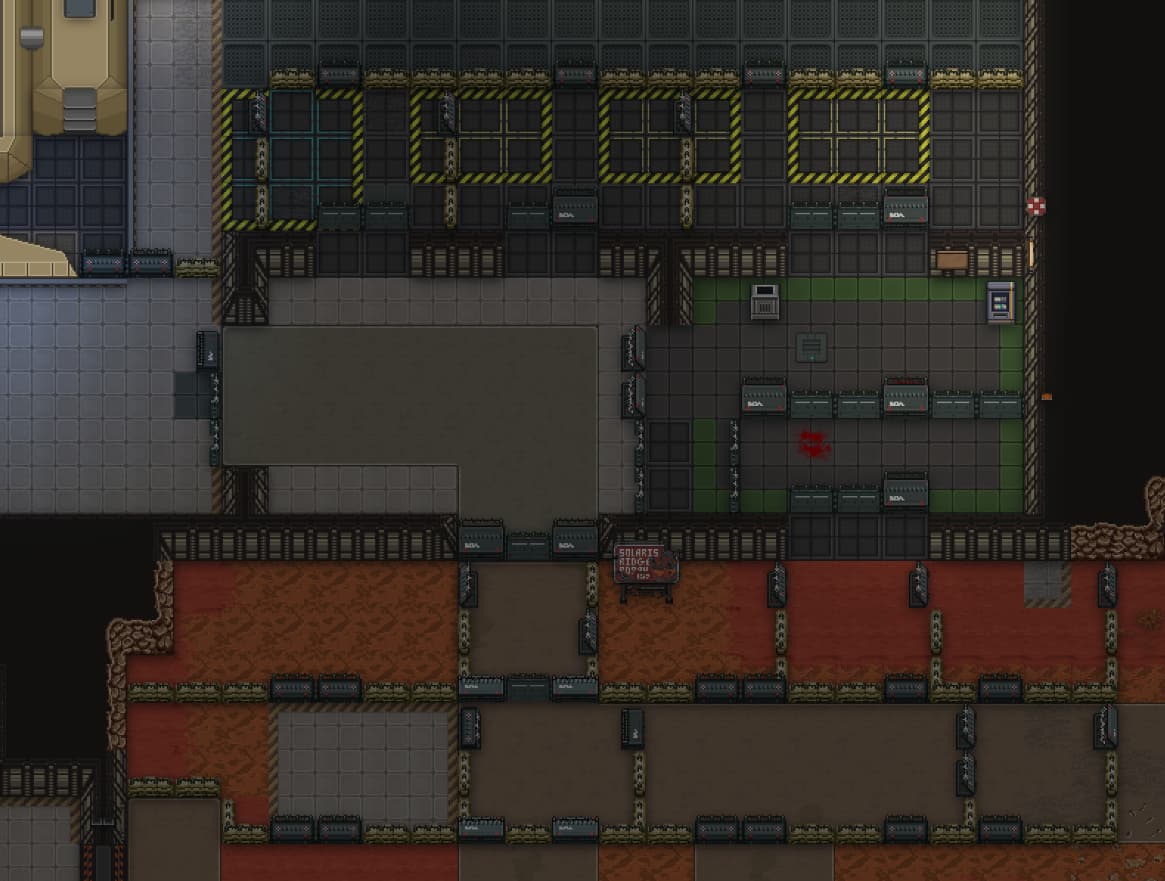
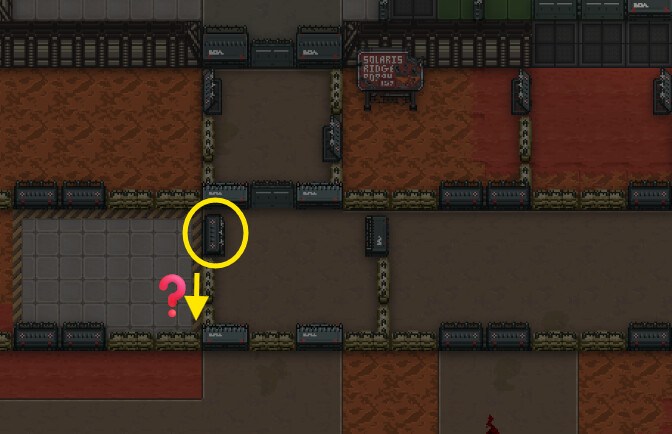
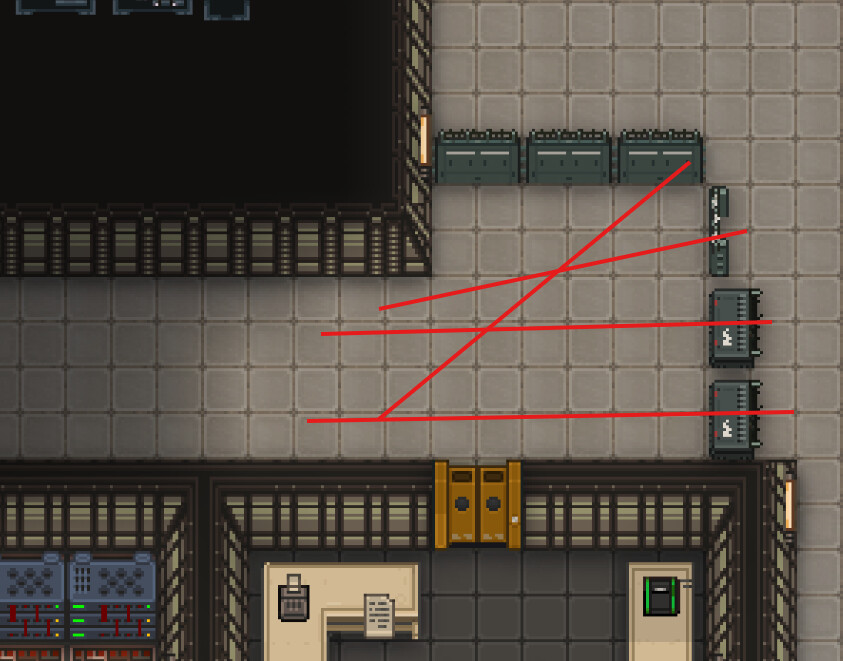
Our second principle is Clear Pathways & Lines of Fire. Now, your line of fire is heavily dependent on the pathways created by the positioning of folding cades. As you’ve already seen, the cades are lined up back-to-back. We don’t want to shoot friendlies or have to hold fire.

By providing clear pathways, you limit friendly fire and Mutual Support is consistent and effective.

Now here is the thing, you don’t want “overlapping” folding cades. That’s bad for business, and someone could accidentally click the wrong cade. Furthermore, you want to ensure that the people firing at the enemy do not get pushed around.

To achieve that, you’d have to put the foldable cades (connecting trenches) further inside the FOB rather than out. As demonstrated in the picture below.

Fallback Positions

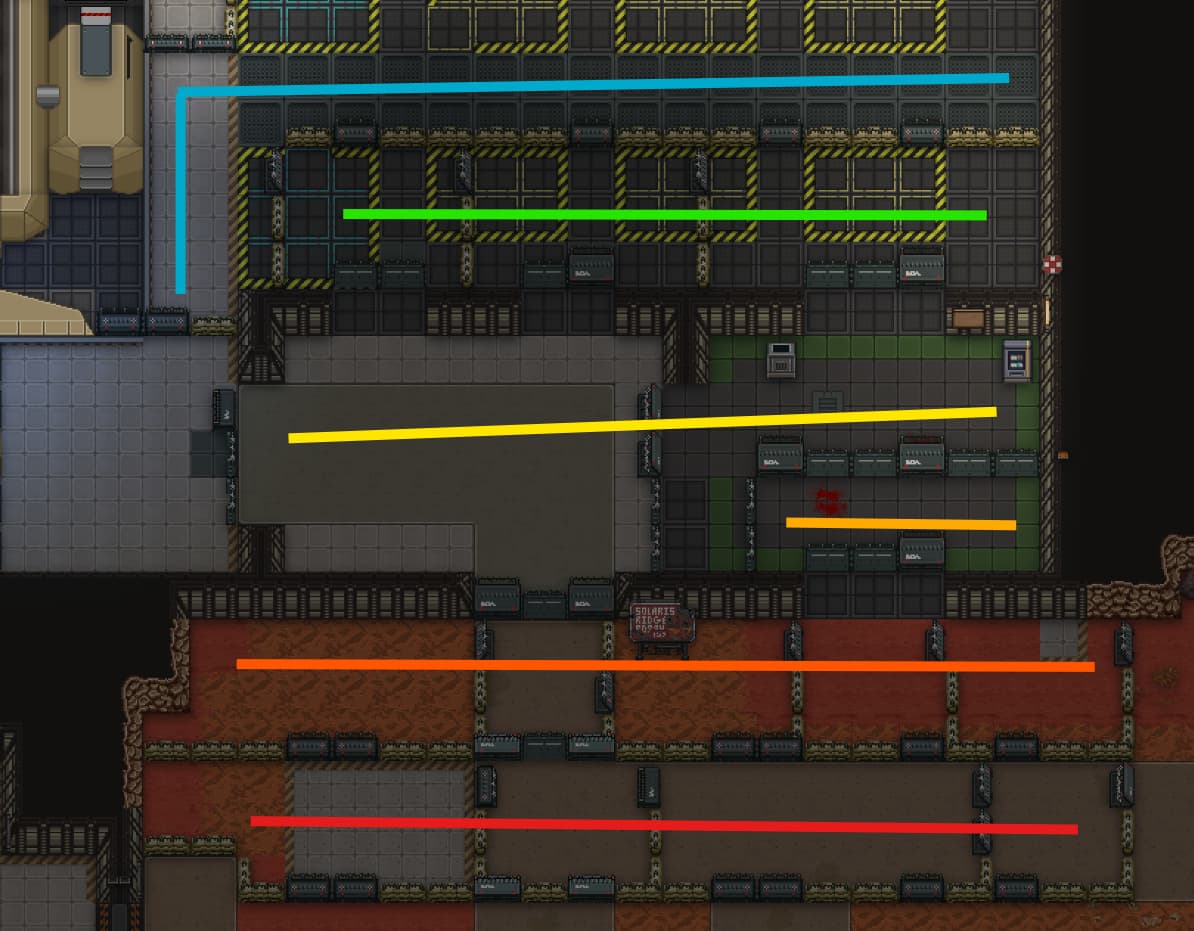
Now, this is critical. You must have fallback positions to ensure that if the front defenses fall, marines can collapse to secondary positions. Buying you valuable time to bleed out the enemy, and perhaps get enough points to

As you can see, we have about 5 defensive positions for the main defense effort. This will buy us precious time to weaken the enemy before we retreat. It’ll also give us time to load up important supplies for the ship’s defense.

Dropship Defense

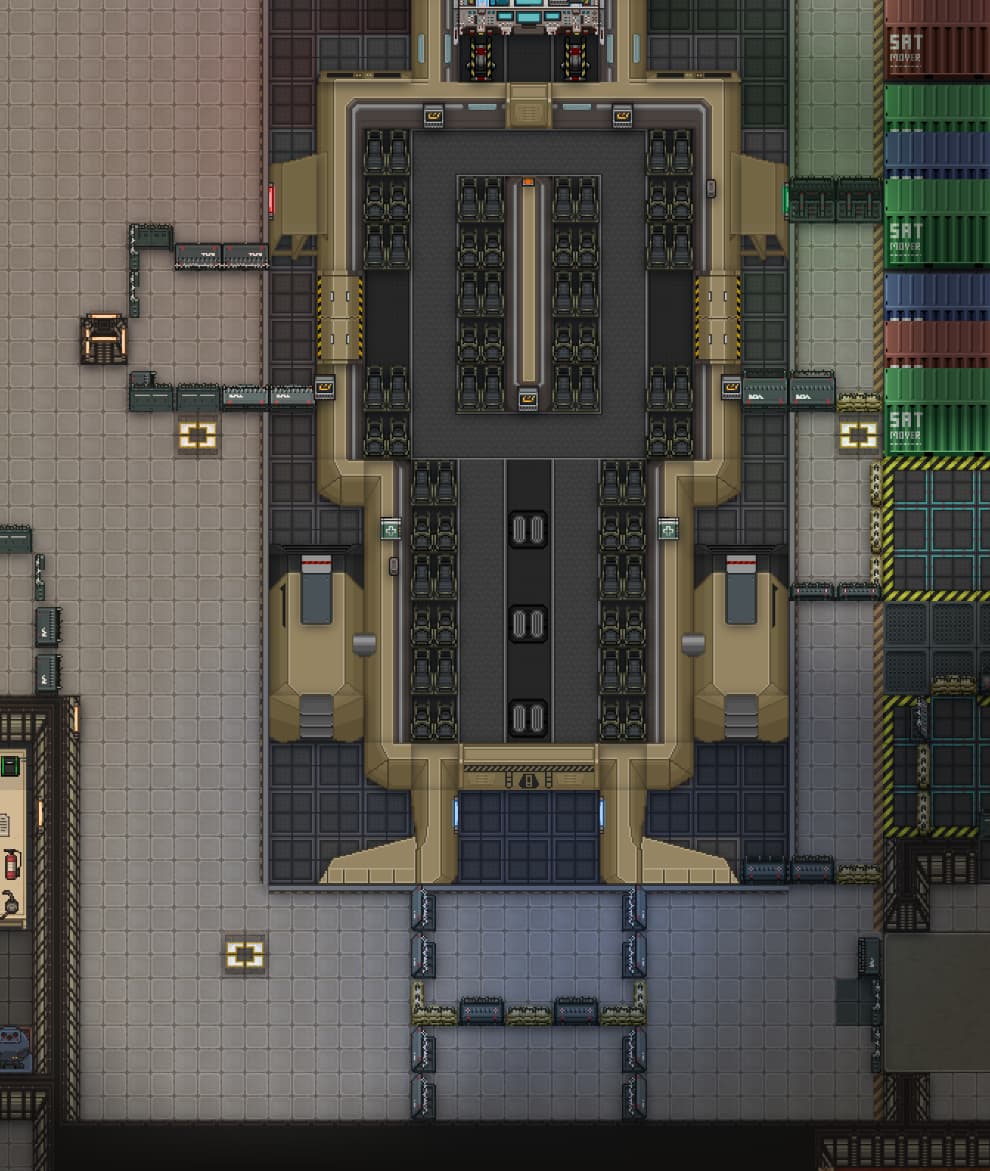
People usually neglect defenses for the dropship, yet I cannot highlight how super critical and necessary it is to build defenses for the dropship.
Not only do they act as fallback positions, but they also act as a makeshift hospital if the FOB is breached, where Hospital Corpsmen and the Field Doctor can heal Marines safely. They further prevent xenos from running onto the dropship throughout the operation or during evacuation.

Additonal Concept(s)

Natural Defenses

Use natural terrain or pre-placed walls to your advantage. You have a limited supply of materials you could use for your defenses, and need to make good use of them.

Force Xenos to “crowd” around certain areas, which limits their effective capability and allows you to whittle them down.

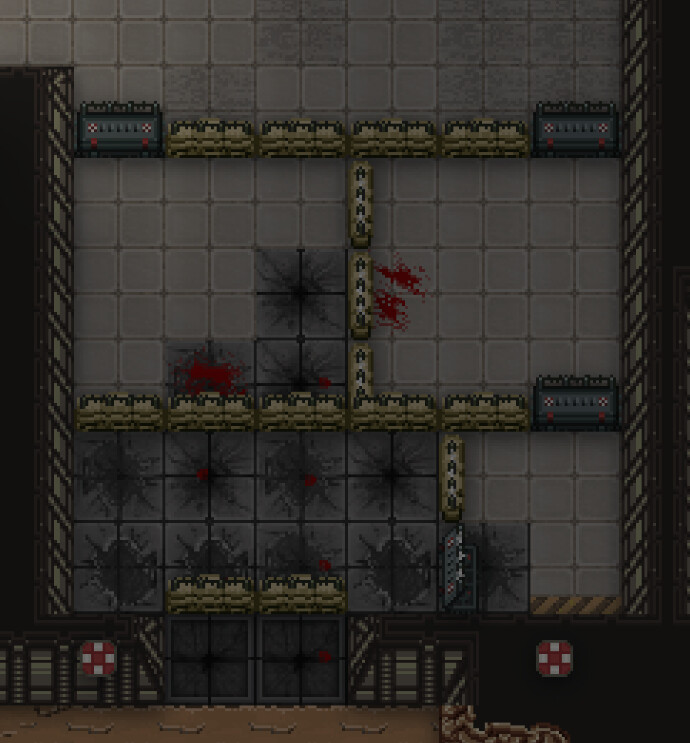
Narrow Hallways are bad for Marines, but if the enemy needs to push through them, then it’s good for you. Moreso if you have several defensive positions on the other end. If you look at the picture below, you can see that the pathway is very narrow and long, but you have the advantage as you shoot the enemy from the safety of your cades. They would have nowhere to hide from you.

TLDR
  • Use sectional defense
  • Don’t block lines of fire
  • Build clear pathways
  • Build fallback positions
  • Use natural defenses

  1. I mean, they can hold in FOB for 5 minutes to make it somewhat robust, but incompetence reigns supreme ↩︎

  2. Military Term ↩︎

  3. Forward Operating Base Security ↩︎

12 Likes
  1. Are Sandbags specifically chosen here, or was that the easiest to spawn?

  2. You mention the importance of walls to force Xenos to crowd up, would you keep all the walls in this photo, or which ones would you remove?

3 Likes

How do I get marines to stop undermining my DAMROD because they keep leaving the doors open, wise one???

4 Likes

The rage building just thinking about the tank spawning.

4 Likes
  • I wanted to highlight them as an option, they’re more-or-less the same as a normal cade in terms of health, and to repair them, use sandbags instead of welding. I need to test to see if that’s faster than welding or not, though, but I think so…?
  • Personally, I’d keep them all up as they also limit a Boiler’s range of fire and decrease the areas that the xenos can attack. The green line acts as buffer while the marines can man the blue line - maximizing firepower into a really narrow entrance/exit point. You can of course, take down the walls if you want, and in this case I’d recommend the North-West areas, and the East is less likely to be manned.

Well, you can scream at them, or stunprod them until they learn. It is the greatest skill issue Marines have, frankly.

This build does not consider the tank (200 pop needed). In which case, it very rarely spawns. Either way, you can make more tank/APC-friendly builds and that’s not hard to do.

3 Likes

Personally I’d completely obliterate every breakable wall, open spaces are marine heaven, walls are a xeno buff that gives them cover. As xenos breach FOB, the walls give them breathing room that makes it hard to dislodge them later. As the ranged faction marines should obliterate every single wall they see with few exceptions.

Boiler gas benefits from walls by allowing the boiler to effectively shut off a greater % of sightlines per shot, and also ensures that marines will be worse at chasing and counter-attacking for kills due to better gas cover. (Which is why boilers excel in cave chokes, and are much worse when marines are in a flat open space.)

Breakable walls can be attacked by xenos anyway- They can just melt and poke holes into them, allowing them to shape the walls to their own advantage. Better to deny the xeno team that privilege altogether imo.

7 Likes

Montage of nuke disarmings version 3.5

2 Likes

Cading dropship doors prevented more Queens from locking the dropship than that change that made locking take 3 seconds.

Sandbags are better than people think, also easy to carry around.

I am also an anti-wall absolutist, though there is some value in walls - they block boiler globs and screech.

4 Likes

I love aggressively sandbagging (and also placing sandbags.) The insta deploying lets you steal a lot of ground. I enjoy throwing them around corners of cave chokes when I can get away with it (specifically Prospera)

I dont even view them as defensive anymore

6 Likes

As a boiler trapper, I approve of this post.

4 Likes

Schofield has been real quite since this awesome guide dropped. Well done sir.

2 Likes

I mean only the bit south of the LZs entrance is a trapper heaven (because you can hit 3 sides - 9 cades at the same time) the rest is fine against trappers

2 Likes

You actually do not need fully containerized areas like this for defense in depth, and your cade-door layout and the layout in general I’d argue even hurts the defense in depth concept.

The point of defense in depth is not just to slow down and blunt attacks to stop breakthroughs, but critically to also have reserve forces positioned to counter-attack, which your containerization partially achieves - but it’s way way too dense to genuinely support and enable.

The idea is, the enemy gets drawn into an indefensible position and is now surrounded by troops in fortified positions that they may have even bypassed and who can now push out immediately to assist a counter attack. Defense in depth tries to stagger the battle out so the enemy becomes exposed and vulnerable in the process of attacking while you reduce your casualties during your retreat because you have small fortifications the entire way.

This picture better follows the defense in depth concept:

Think of it like having secure ‘forts’ that marines can resupply/rest/heal/attack from and outward fortifications that they can skirmish around quickly and easily when they go on the counter-offensive. These unconnected cadelines can also, very quickly, get turned into full cadelines when needed, so you can quickly ‘resecure’ lost ground in an adaptive way.

This also massively reduces the overall material expenditure on the cades while still giving you most of the protective benefit of a full cadeline, so you can extend this style across an even larger area.

Really the biggest problem with doing this is Pvt. Stanley the Combat Engineer seeing the gaps and deciding, oh I can fill that in with a cade, because he doesn’t understand the gap is a purposeful decision and is actually helpful and not someone’s mistake.

6 Likes

Good basic guide, but I think the other side of FOB defense also needs to be touched upon:
In the beginning the good God Ahura Mazda created the Universe. Then he created FOBs. And then Bravo to defend those FOBs. But the evil god Ahriman built walls on those colonies, to bring the faithful into temptation. Yet, a real Bravo marine knows the real price of those cursed gifts and would never be fooled by them. And in the coming Apocalypse all the forces of evil would be vanquished, all beans would be clapped, and all the walls in the universe would be destroyed.

So yeah, if you’re doing perfect Solaris LZ1 defense at least those walls on the west of the main entrance should always be removed, because it’s like the most classic textbook Queen approach angle.

4 Likes

Bravo lore just dropped.

3 Likes