Foreword
There is one Mortar guide on the forum covering some advanced techniques: How to be a Strong Independent Mortar User (Advanced Mortar guide and maybe a little CAS)
I wanted to cover the basics of Mortar-ing, primarily because I often hear “I have no idea how to use the Mortar” when I ask someone to buddy up with me.
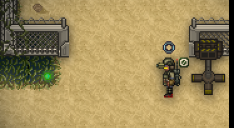
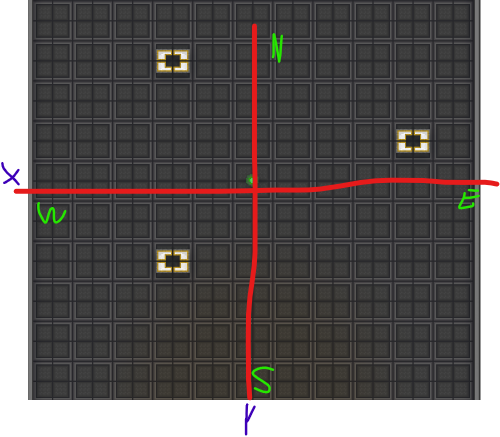
The Mortar used to be a staple of every FOB, Bravo SL would sit his ass on a chair and drop shells into a tube.
A little like this:

However, THEY didn’t like that you could spam Mortar under FOB Siege concerned citizens thought Mortar would be more interesting if it had a minimum range and maximum range.
Where THEY take, THEY give: Mortar shells were made cheaper and moving the Mortar closer meant that the “closer to target = shorter flight time” mechanic made Mortar more responsive to the front.
This change, effectively, deleted the Mortar mains that existed at the time because now you have to roleplay to use the Mortar and the skill floor raised from “sit in FOB, put one hand on the numpad and one hand on your mouse” to having to move and navigate Prime Lurker Mafia hunting you while you try to provide fire support.
This guide will:
- Teach you how to use the Mortar
- Work the basics of co-ordinates, offsets and lasering targets.
- Teach you how to co-ordinate with someone and use the Mortar
- Give an opinion on what maps you would enjoy using the Mortar on
This guide will not teach you:
- How to make custom mortar shells
- Map-Specific strategies to use
What is a Mortar?

The Mortar is an important fire support asset for the Marines, capable of bombarding Xeno positions and inflicting damage and crowd control without having to risk the infantry’s life and limbs.
While it’s not as powerful as the Normandy Gunship, it fires with less warning meaning it requires less prediction to be successful, at the expense of being less powerful.
It comes inside the Mortar Kit (location explained later).
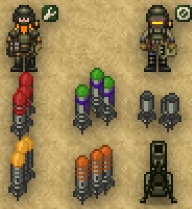
The Mortar Kit contains a Mortar, two Mortar Pamphlets, two belts and a backpack as well as complimentary wrench and binoculars.
Use Z to deploy the Mortar from your hand onto the floor.
- The Pamphlets are needed to give Riflemen access to the Mortar.
- The Binoculars are used find targets for the Mortar
- The Wrench is used to un-set the Mortar.
- The Backpack and Belts can be used to carry some of the shells to remain somewhat mobile, without being tied to a crate.
What you need to know to use the Mortar
Understanding co-ordinates:
Press Z while holding a Rangefinder or Laser Designator to look down the binoculars.
Press Left Control + Left Click to laze the tile you click on. You MUST have direct line-of-sight to the tile to laze it.
Successful:
Failed:

Left Alt + Left Click a Laser Designator to swap it to co-ordinates mode. A rangefinder only has co-ordinates mode.

The read-out will give you the X, Y and Z co-ordinates.
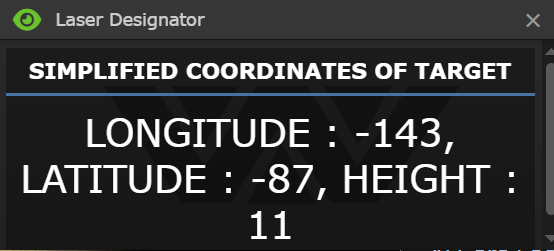
The Mortar Operator will dial these co-ordinates.
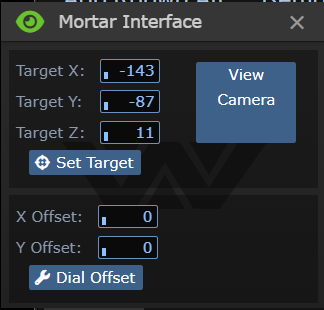
Understanding Offsets:
The Mortar has an offset menu, which allows you to offset along the X and Y axis.
You probably learnt co-ordinates in school. SOUTH and WEST are negative offsets. NORTH and EAST are positive offsets.
Due to poor line of sight, the Spotter may laze a co-ordinate but the shell needs to land 3 north and 3 east of the lazed tile. That is +3Y +3X offset.
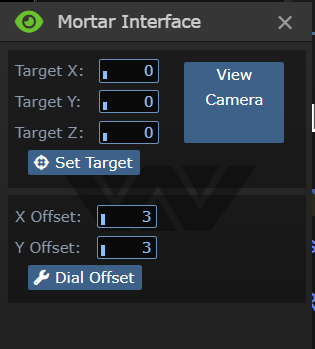
Important: the offset stays between shots. Set to 0,0 before changing co-ordinates to prevent accidents.
Z-Level Offsets
Mortar is a little fuck-y with Z-Levels.
A fun thing to do is being lazing over the top of Xenos, knowing where they are, relaying co-ordinates to the Operator and telling them to lower Z-Level. You can laze Xeno positions without being at risk in any way.
As far as I understand, a shell hitting “empty air” tiles will make the shell land on the lower Z-Level.
Incendiary shells that come into contact with “empty air” tiles will spill out onto the lower Z-Level.
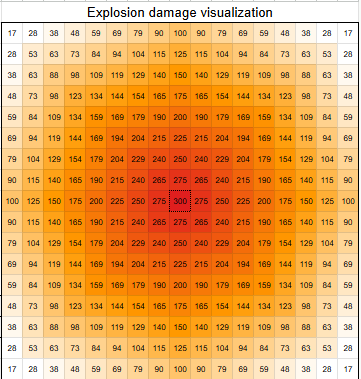
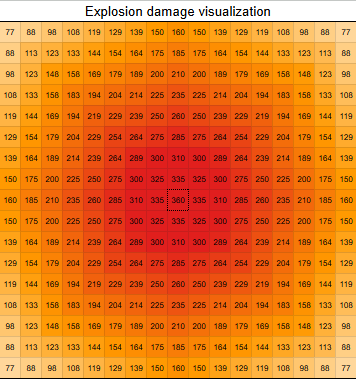
Understanding Shells:
You have five shell types:
-
(Inc)endiary

-
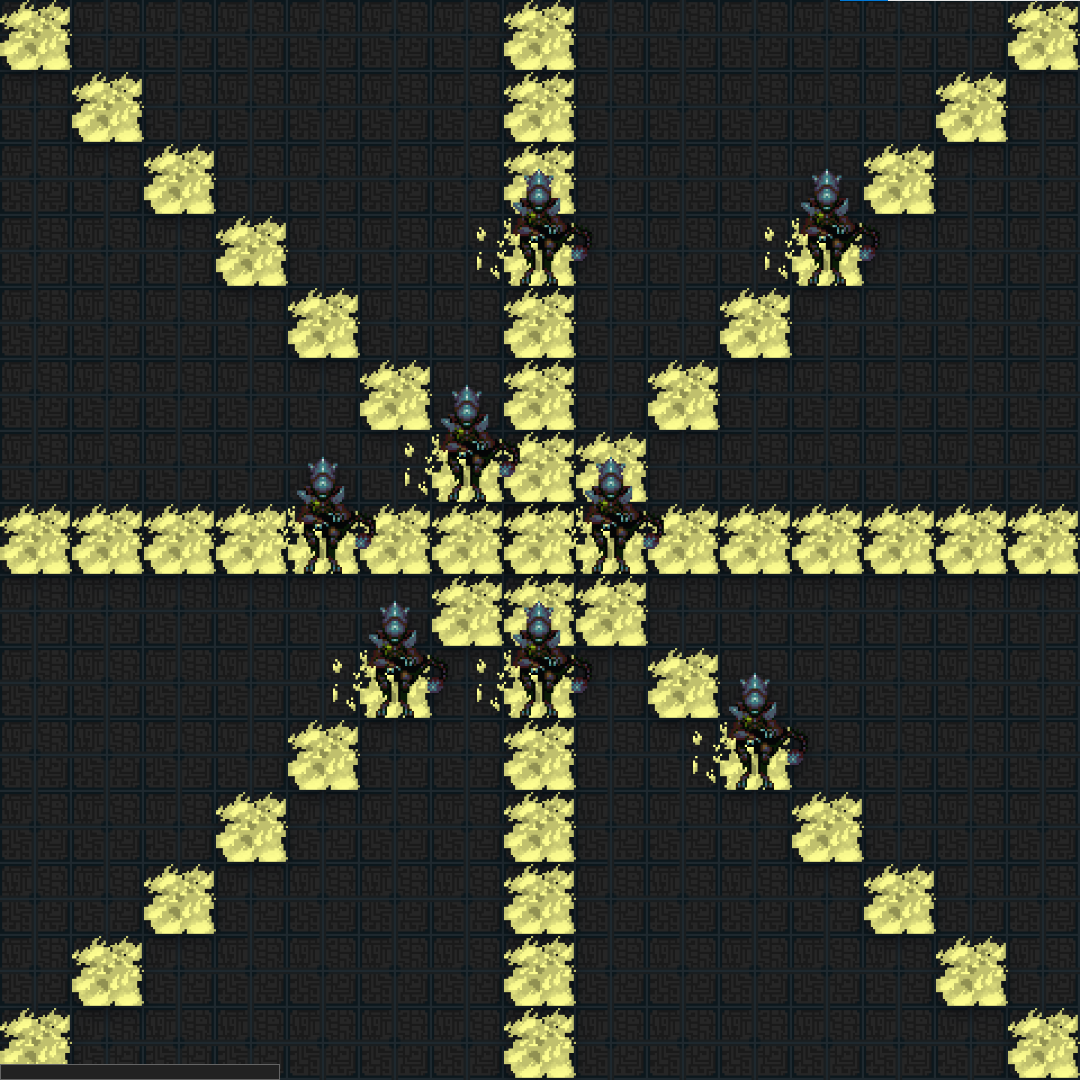
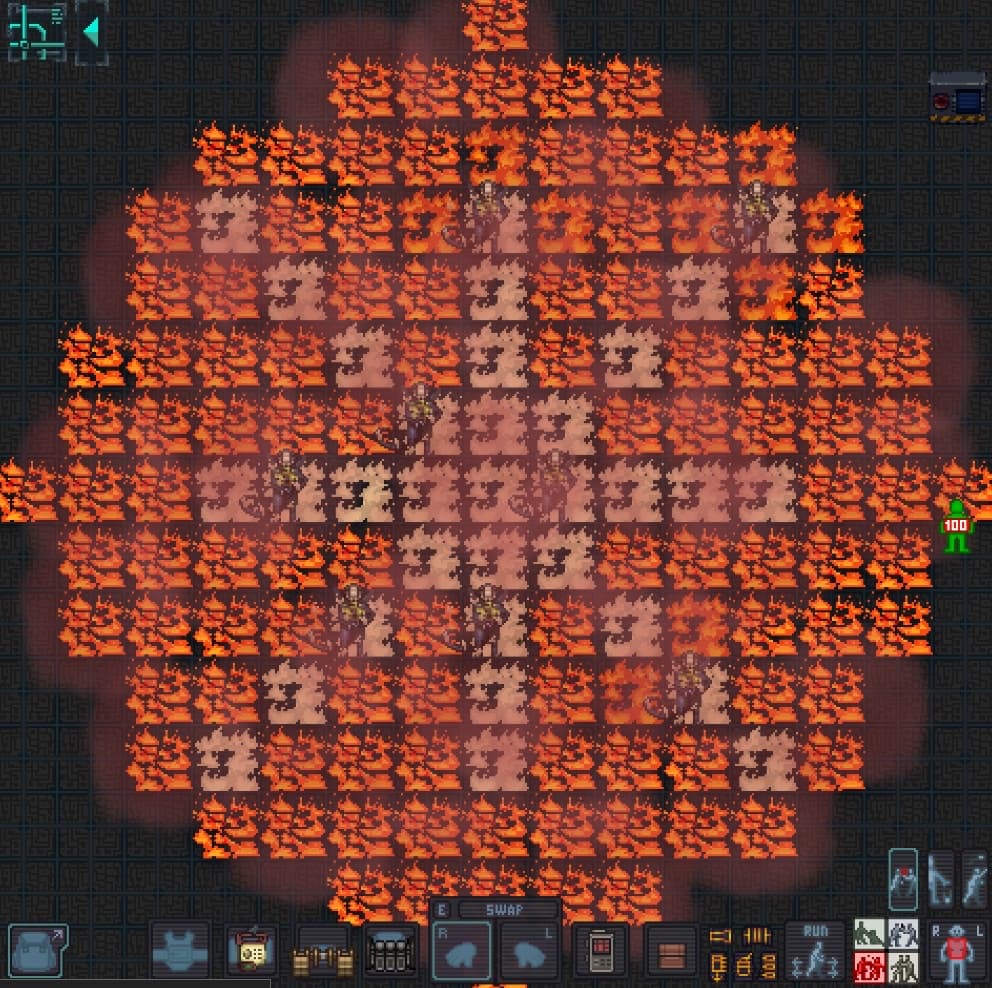
- This will cause a pool of fire in a vaguely star pattern, about 9x9 (5 in each direction from the laze) in size.
-
(H)igh (E)xplosive

-
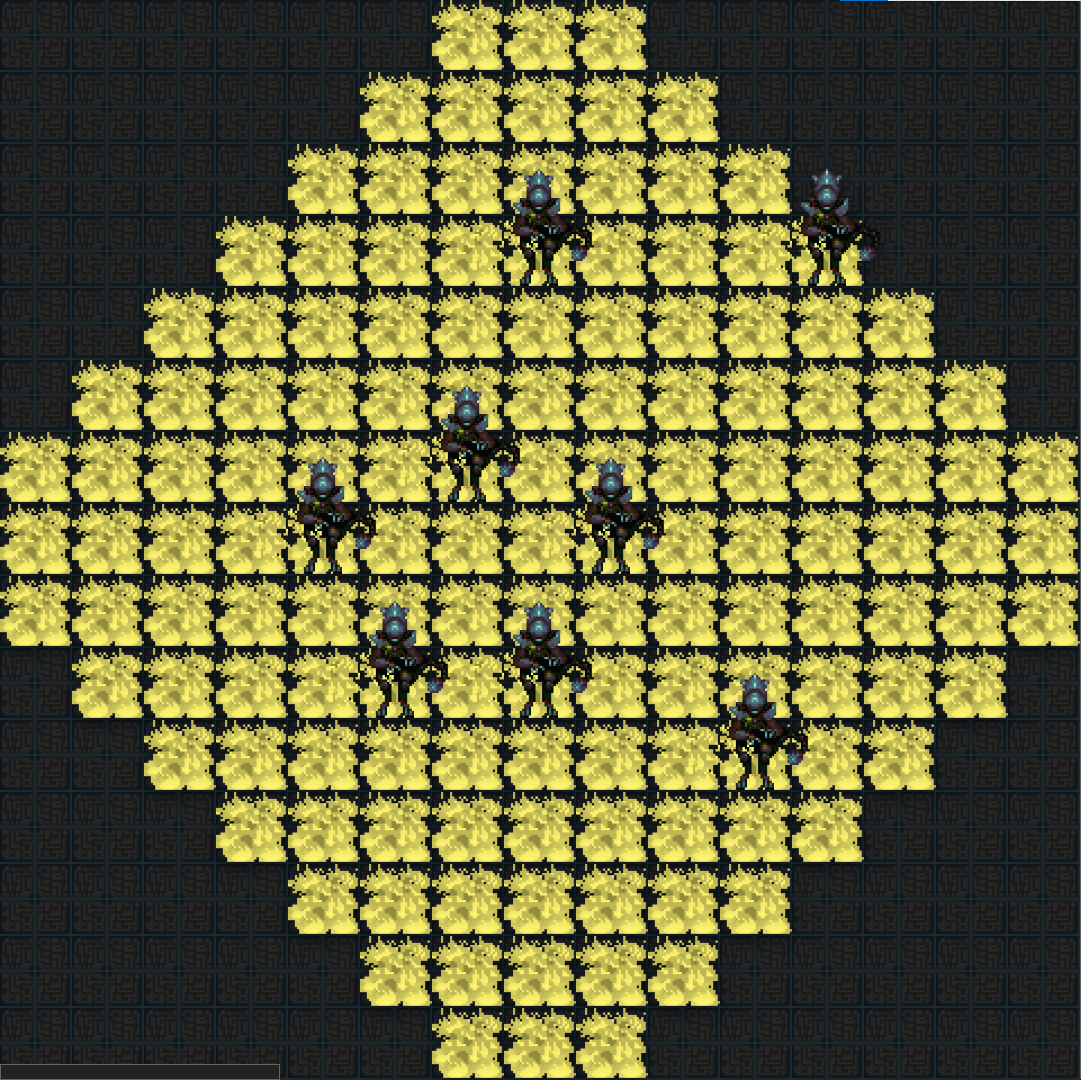
- This will cause a blast in a 9x9 (5 in each direction from the laze) circle.
-
(Frag)mentation

-
- This will send shrapnel in a wide radius, causing basically no damage to Xenos. The primary use of this is scaring Xenos via the whistle of the mortar shell, or griefing Marines.
-
(Cam)era

-
- This lets the Operator see the target area through the Mortar’s interface, allowing them to fire independently if the Spotter needs to focus on something else.
-
Custom

-
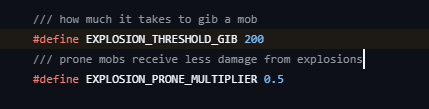
- You should call the Ordnance Lab (Almayer Tab) and ask them what this does. It will normally be labelled: either a huge blast, or an *-shaped fire (typically 10-15 tiles in each direction from center). Both are capable of huge friendly-fire, even gibbing Marines.
-
- Fire at your own risk.
What can I ask the Ordnance Lab to make for me?
Refer to this: What THEY Won't Teach You In Marine Guides: Mortar!? - #2 by Ammoniacres
Don’t worry too much about ranges, you will instinctively learn where you will and won’t hit friendlies as you use the Mortar.
Finding the Mortar, Finding Friends.
The best way to use the Mortar, in my opinion, is as part of a 2-Marine team:
- Spotter: Fireteam Leader that spends his time lazing targets on the front.
- Operator: Combat Technician, or Rifleman, that fires shells using the Mortar.
If you can’t convince a friend to play Mortar with you, you will need to find someone at the start of the round who’s willing to play with you.
If you have a friend:
The Spotter will roll Fireteam Leader for the insane JTAC skill the role has, making lazes near instant.
The Operator will roll Rifleman or Combat Technician; Rifleman can use the Mortar if they read the pamphlet however Combat Technician can bring a turret for self defense and assist with building in the rear for Corpsmen and Supply Dumps.
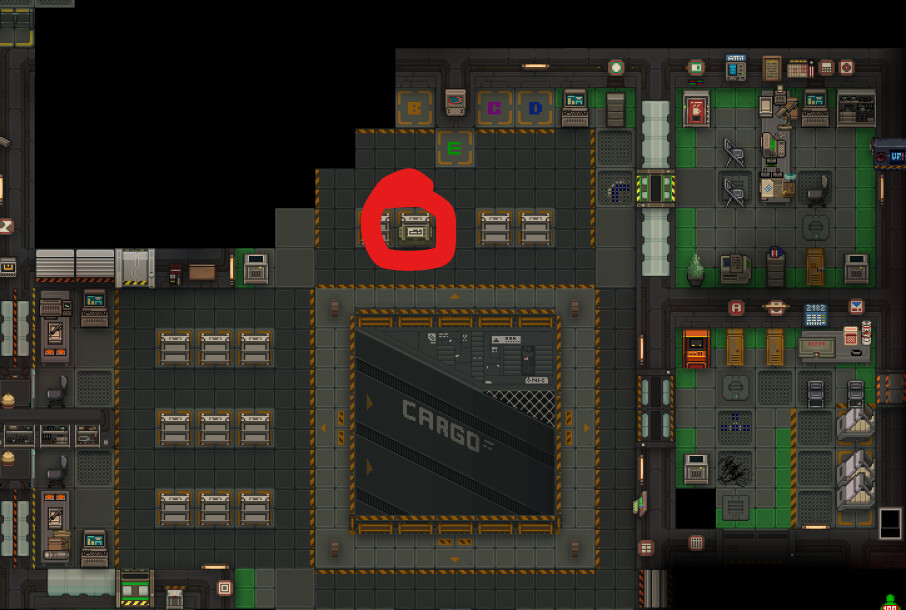
Rush to Req, you want to ask for the Mortar Kit. It’s near the Supply Launch Pads if the Cargo Tech isn’t aware.
You should ask for boxes of M20 Mines, an RTO Bag and JTAC Key for the Operator.
- Mines will cover the Operator.
- The RTO bag and JTAC Key will be used so you can directly call the Operator to use the Mortar, and the JTAC Key will be used for co-ordinates from non-Spotter FTLs.
At the consoles opposite Req, put in an order for:
- 2 x High Explosive Mortar Shell Crate
- 2 x Incendiary Mortar Shell Crate
- 1 x Camera-Flare Mortar Shell Crate (Optional but beneficial)
Then hand the paper to the Cargo staff.

You should get some MREs from your prep, as well as some flashlights or flares and carry them with you.
- Keeping the area lit and
- your Operator fed will reduce their chance of getting killed or captured.
Requsitions and You
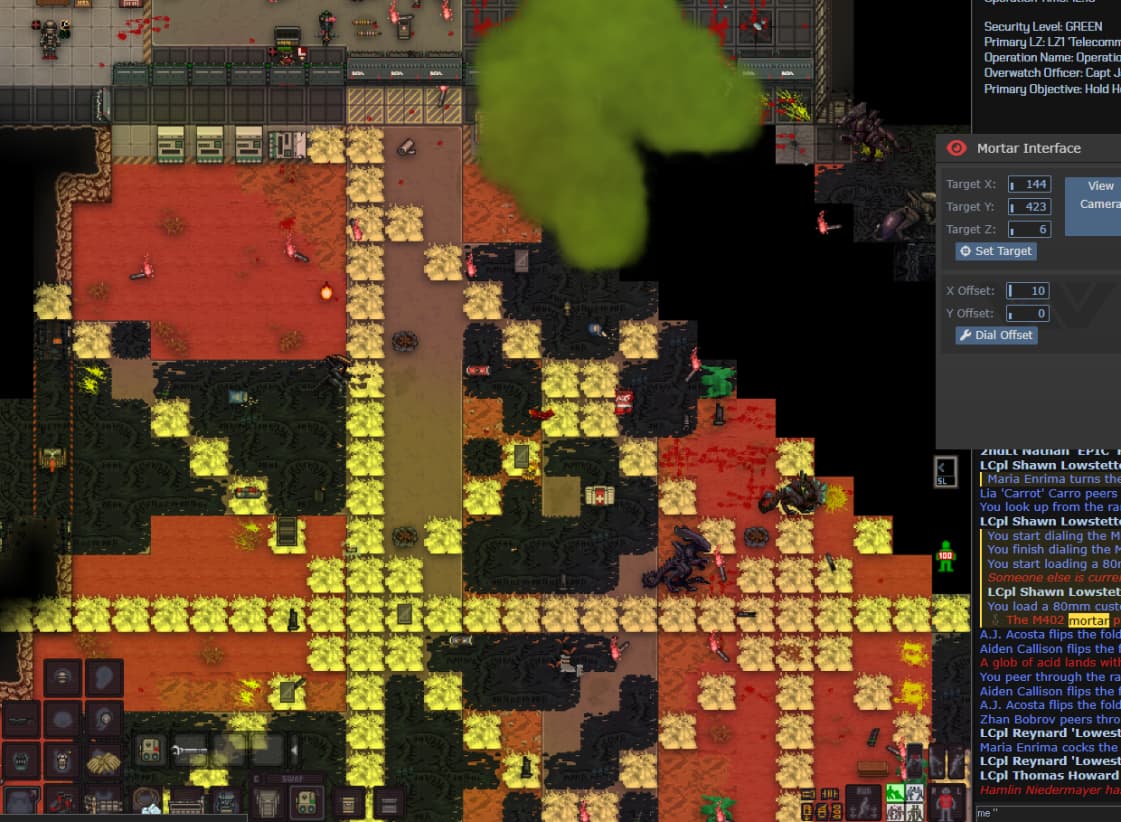
Ask Requsitions to pack the Mortar Shells into a crate, and loaded onto a supply drop pad. This means you don’t have to waste time hauling the shells around. When you set the Mortar up, you can laze under your feet and relay the co-ordinates in order to have them sent to you planetside, effort free!
I’ve got too many friends!
Asking the Captain or Major for Echo could be a good idea. I, personally, struggle to keep up with the chat especially in crowded squads when I’m in a Mortar Team.
The More the Merrier. You can always use help guarding, and if you’re on good terms with QM you can order a second tube. Otherwise, the cooldown to firing shells is as fast as you can load it. You can have two people fire two shells almost at once.
I’ve got no friends!
All of the above, but go around begging for someone to spot or fire for you.
You should be ready to teach someone how to use the Mortar, and be ready to be patient.
I’ve got the Mortar, I’ve got friends, what do I do?
1. Agree on your “Fire Mission”
Targets, especially on a fluid front, will appear only for a few seconds. Agree what shells you will be sending upon any “FIRE!” order. High Explosive, then Incendiary is a good idea. You clear the area, stunning Xenos, then maximise the area you light up with the incendiary shell.
2. Get to work!
Set up close to the front, you shouldn’t be able to see the line of contact with your binos from the Mortar (this’ll keep you outside minimum range.)
You are handling one of the most important pieces of Fire Support that Marines have: no one else was going to take it anyways but you’re still contributing a lot to the team.
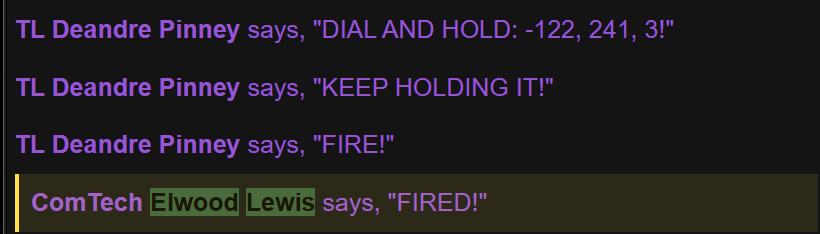
Use JTAC or the Radio-Telephone to keep contact between Mortar and Spotter.
Using JTAC:
- Warns people shells are coming
- Lets other people freely give co-ordinates for targets
Using the Radio-Telephone:
- Your only option if the Communication Tower is down, other than running back and forth (waste of time).
- Lets you use the phone in-hand to block the headset from working, letting you freely relay messages without having your chat spammed.
- If there’s no reply, you can know your Mortar is under attack.
With, then without activating the phone in-hand:
The Operator should set up, get comfortable so shells are accessible, keep an eye out and set up mines around themselves. Light the area up with flares for safety. Position the Mortar interface on-screen somewhere comfortable for quick access.
Placing barricades around the Mortar Pit, or better, positioning the Mortar at a Supply Dump or Triage is important for safety. More populated areas will have Marines close by who can protect the Mortar.
The Spotter should primarily aim to disrupt the Boiler with High Explosive, Incendiary, Fragmentation shells. After that, the Spotter should aim to land Incendiary shells behind Xenos, especially Queen Pushes to disrupt Xenos who are retreating and keep other Xenos from pushing ahead. Camera shells can be sent into large concentrations of Xenos to let the Operator fire at will.
Xenos fled to caves under intense artillery bombardment!
You get a break. Stock up on shells. Keep the Mortar somewhere safe, where backliners can’t melt your crate or push it into Brazil. Get ready for the front to collapse and Marines to come pouring out of caves.
You need to be ready for the Queen to flank your rear, your position should be secure so you don’t wipe out. The Queen could also chase Marines directly out of caves, be ready to provide Incendiary Shells to prevent the complete wipe.
Xenos are coming to the FOB!
You managed to save the Mortar, or the shells. If you failed to save one, or the other, or either - beg Req… (and be told they’re out of money).
If you have anything left, set up near the Alamo and try your best to break any large concentrations of Xenos from breaking into the LZ. Be ready to move to counteract your minimum range. Be ready to get screeched.
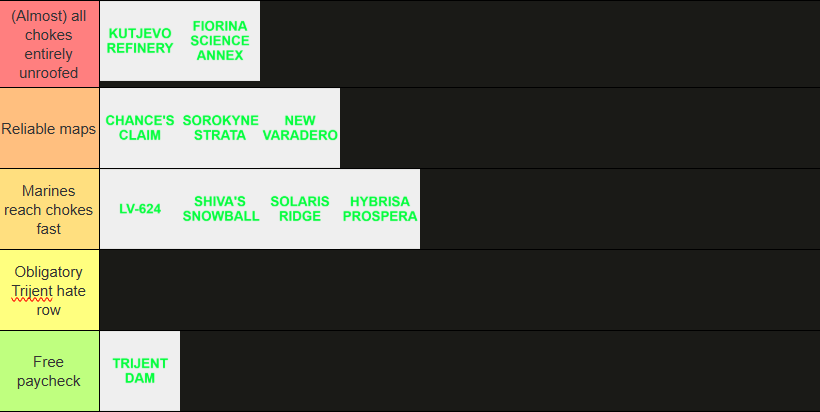
Extra: When should I play Mortar?
I polled the only Mortar-Guy I know from after the Mortar Nerf: @Ammoniacres
This is what maps they recommend for playing the Mortar on:
Extra: Laser Targeting Mode
Left Control + Left Clicking the Mortar can switch it to “laser targeting mode”, meaning it will fire at the CAS (red) lazes from the linked laser designator.
Left Click the Mortar with your Laser Designator to link it to the Mortar.
This makes the Mortar automatically target the laser, without need for co-ordinates.

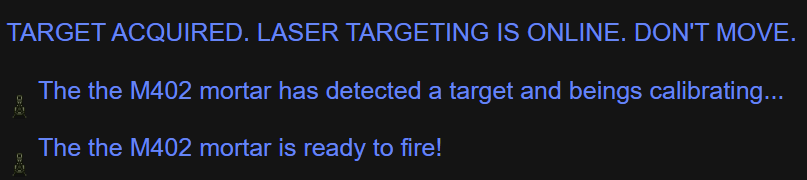
It sounds nice, but the red dot is a HUGE warning for Xenos, and it’s not capable of offsets. If there’s a need for the Mortar to fire independently, there’s no co-ordinates to offset from. It sounds easy, but it’s generally not worth much, especially given most combat areas in a map can’t be CAS-lazed anyways.