Introduction
This is a comprehensive guide to being a Medical Corpsman for the USCM or any other human force in the galaxy. This includes discussions on the concept of health in CM-SS13, all relevant medical items and their use, the process of healing someone, and overall strategy and survival tips.
Who Am I?

“I’ll stake my reputation on this.”
“You don’t have a reputation!”
“I’m hoping to get one from this!”
Final recorded conversation of Lcpl Bentway, Operation Screaming Anguish
I’m Alan Bentway, I’ve played CM-SS13 and its variants since its virtual inception. I’ve been fighting since the earliest days where we were merely Syndicate strongmen with C-20r SMG’s fighting against the aliens, atmospherics and the admins.

Oh God I Just Spawned What Do I Do?
If nothing else, skip to the bottom of this guide for a quick overview of a basic setup you can give yourself in a few minutes that will carry you through an average round.
One Solid Piece Of Advice
 NEVER double team another Corpsman’s patient unless you know what to do
Appearance
Appearance
The first major point of discussion, your visual appearance in-game.
Left: Generic Easy To Spot Corpsman
Right: Decently Disguised And Fashionable Corpsman


Aliens are not signatories to the Geneva conventions, ergo they will mark Marine Corpsman as high priority targets. The only way a Xenomorph (or hostile human) has to tell apart a Corpsman is what they look like and what they are doing. Wearing your default helmet and uniform will make you an easy target to spot.
In rare Human versus Human scenarios, it may actually be worthwhile to advertise your medical status. However, there is no guarantee the opposing force will spare you. The terrorist CLF don’t care and the communist UPP subscribe to their own twisted value systems.
By taking actions such as obfuscating your Medic helmet, swapping your backpack/satchel for a non-medic version, changing to a standard marine uniform and using something to hide your medical eye scanner (gas mask, balaclava, etc, etc), you’ll be significantly harder to spot from a crowd. All of this can be done easily with the default gear spawner in your squad req, as shown above. Additional, and more fashionable, items can be bought via your ‘Edit Character’ page.
Other Marines will know you are a Corpsman on your hud, so don’t worry about not being noticeable to wounded Marines.
Fashion is everything, so have fun.
Hiding Lifesaver Belt
Left with M41A
Right with Shotgun


Your lifesaver belt, the most commonly used and subjectivly best belt, is the only major indicator of your Corpsman status if you have hidden every other indicator. There are several ways to hide it. Firstly, there are two weapons which, when holstered, will automatically hide your Lifesaver sprite as evidenced above, those being the.
- M41AE2 Heavy Pulse Rifle
- M37 Shotgun
Corpsman facing right

You can use items like the broken night vision goggles, rain cover or netting (cosmetic items vended from the cosmetic vendor) to hide the medical symbols on your helmet. However, you could simply replace your Corpsman helmet with a non-Corpsman helmet, as you can vend a free Health Visor rom the equipment vendor.
Another strategy is to keep your character looking to your right side whenever possible, as this also hides the sprite
A dead Corpsman is a useless Corpsman. Your first defence is not being noticed.
Health Conceptualization
Health
All humans have 200 health, represented in-game as being between 100% to -100% health. Above 100 health (0% to 100%) is the normal state. Being below 100 health (-1% to -99%) puts the human in critical state. Reaching 0 health (-100%) results in death.
A dead human can be revived via a defibrillator, returning them to life. Once death occurs a 5-minute timer begins, once this time elapses the human can no longer be revived. A human can only be revived if their total health is above 0 health (-100%).
It is possible for a human to take damage beyond 0 health. Xenomorphs cannot damage a dead Human further when they die, however marine gunfire, explosives or incindiary weapons can cause further damage.
A dead human being given CPR by another human will extend a dead humans revive timer so long as they can maintain an accurate rate of CPR. Generally, you want to perform the CPR action about in 3 second intervals following the completion of the CPR action.
Aliens are subjected to this system, but their health operates in a far simpler manner. This is not your concern and is beyond the scope of this guide.

A deceased human, death by brute damage.
Damage Types
Damage can be divided into five types
- BRUTE: Inflicted by physical trauma (bullets, claws, knives). Sufficient damage to a limb can cause bleeding or bone fractures. Fractures can occur when a limb has received more than 35 damage, or 50 damage for the chest/head/groin.
- BURN: Inflicted by acid, incendiary weapons and extremely cold or hot environments. Causes a significant amount of pain generation compared to brute damage.
- TOXIN: Typically caused by drug overdose, damaged organs or long exposure to neurotoxin clouds from Boilers. Very rare. Large amounts of Toxin damage will cause the patient to vomit and stun them for an extended duration.
- OXYGEN: Typically caused by being in critical health or from damaged heart/lungs. Can also be caused by being asphyxiated/chocked by another human.
- PAIN: An abstract form of damage. Brute and Burn damage cause pain generation, sufficient pain can cause a Marine to be slowed down or knocked unconscious, even small amounts of damage can cause this, Burn causes significantly more pain generation. Pain is countered with painkillers, typically either Tramadol and/or Oxycodone, and healing the injury causing the pain.
In addendum to pain. Synthetics do not feel pain, or love. Certain humans have higher pain tolerances than normal, however these are typically only seen in ERT or admin event humans, such as the Dutch’s Dozen. A human with a strong painkiller can resist falling unconscious even if they have sustained a lot of damage and/or are generating a lot of pain compared to someone who is not under the effects of a painkiller.
When performing surgery, a human who is not under the effect of a painkiller, or is not unconscious, is very prone to causing the surgeon/corpsman to fail the surgery step.
Permanent Injuries
In addition to the above, there are several further ‘permanent’ affiliations that can be acquired, which are harder to remove or alleviate.
-
FRACTURE: A broken bone, causes multiple negative effects on the patient and can lead to future medical issues. Fractures cause pain-generation, leg-fractures cause significant movement speed penalties, arm fractures cause the patient to drop items in that hand. Patients who move with a fracture have a chance to cause internal bleeding or organ damage. A medical splint will prevent that from occurring, and reduce but not eliminate the speed penalty of the fracture. A Fracture can only occur on a limb if it has sustained at least 35 brute damage, or 50 brute damage for the head, chest and groin. Can be permanently repaired via major surgery.
-
DELIMBING: The loss of a victim’s limb, a robotic replacement will have to be sourced by a surgeon. Has a random chance to occur on a limb that has suffered a FRACTURE every time the limb is struck by an attack that deals brute damage; even low-damage attacks may trigger a delimbing, however higher damage attacks have a higher chance to cause a delimb. A human’s head can be decapitated which will permanently kill the victim. However, if a decapitation is triggered if the human is wearing a combat helmet, the helmet itself will absorb the effect and be ripped off the user’s head.
-
INTERNAL BLEEDING: Causes the victim to suffer constant loss of blood. Typically caused by the victim moving with an unsecure fracture, can be also caused due to delimbing, being attacked on an un-armoured part of the body (usually people not wearing a combat helmet) or being struck by a significant amount of gunfire, armour piercing ammo is more likely to cause this. Can only be cured via internal bleeding repair surgery, something a Corpsman can do. A stasis bag will half further bleeding.
-
ORGAN DAMAGE: Damage sustained to a human’s organs, typically due to excessive Brute damage, patient moving while suffering a head/chest/groin fracture, armour piercing attacks or a chemical overdose effect. The heart will also be damaged by a small amount when someone is revived. Organ damage effects can be halted, but not cured, with Peridoxin medication, although ImiAlky medication can cure Brain and Eye damage. Organ damage ranged from 0 to 200 damage, however most lethal effects begin at around the 20 to 50 mark. Organ damage is also halted via a Stasis Bag. Organs and the negative effects that can occur are.
-
- Brain - Head:Impaired Vision, Headache and Pain. User will not die if maximum damage is sustained.
-
- Eyes - Head: Impaired Vision. Blindness.
-
- Heart - Chest: Lowers patient’s blood level effectiveness. Damage causes permanent oxygen damage. If the heart is significantly damaged it can cause ‘heartbreak’ which renders the patient impossible to revive unless the heart is repaired via surgery.
-
- Lung - Chest: Rapid accumulation of oxygen damage until patient death. Coughing up blood.
-
- Liver - Chest: Deals toxin damage.
-
- Kidney - Groin: Deals toxin damage
-
SHRAPNEL: Shrapnel that will cause minor damage on impact, bleeding and will cause further damage whenever the victim moves. Typically caused from bullets, explosive shards, certain kinds of xenomorph attacks, or bone shards of other humans who were gibed by an explosive attack. Anyone can remove this by themselves with any kind of knife or scalpel.
-
BLOOD LOSS: Uncommon condition. Occurs when someone’s bleeding injuries are not tended to, or from Internal Bleeding. Healed via stopping the source of bleeding and blood transfusions/Iron (Fe) + Food (Nutrients). Low blood levels cause increasingly high levels of oxygen damage and eventually toxin damage. Patients inside a stasis bag have all further blood loss halted. Extremely low blood will result in rapid patient death.
-
LARVA INFECTION: Someone has been facehugged! Can only be removed via surgery by a doctor, or Synthetic, using a surgical table (usually on Almayer only, but some maps have planetside surgical tables) Takes 7.5 minutes for the larva to grow and chestburst, significantly faster in a nest. Send patients back to the FoB for evacuation or perform a field Medivac if able.
Just another day in the corps.
Squad Choice
Squad
There are four squads, Alpha, Bravo, Charlie, Delta. All of these squads have Corpsman slots.
If you are new to the role, I would suggest Bravo squad be your first squad of choice. Bravo is always assigned to FOB duty, as such their Corpsmen will generally be relegated (initially) to remain at the FOB, and thus a secure safe zone.
This will give you a chance to ease into the operation, and when casualties stream in they will typically arrive slowly, and since you will be in a safe zone you won’t have to worry or think about Xeno ambushes. You will also generally be closer to ground-side Surgeons and Synthetics, who may be willing to offer tips and advice.

Make your choice
Your Kit
Kit
As a medic you have access to a wide arsenal of healing, and death dealing, tools. This is a list of all relevant equipment, and my thoughts on each.
Weapons
Almost all Marine guns are viable in combat. Remember that as a Marine Corpsman you are in a support role, ergo you should not be selecting a weapon for charging into combat, but to defend yourself, your patient and your position. I will not go significantly into depth with firearms, as this is not the point of the guide, but I will point out the strengths and weaknesses. A general theme you will find with most weapons is Corpsman will struggle to carry a significant amount of ammo, every magazine is one less medical item.

M41A Mk2
Attach-Rec
- ExtBarrel / S5 RDS / A-Grip - Standard Config
- Consider UGL alt to use grenades to shoot dead bodies towards you
- Underbarrel Shotgun can surprise a CQC Xeno that pounces you
Standard rifle, good damage output, spare ammo is typically plentiful. Struggles with ammo management, likely only able to carry a few magazines, will run out during sustained gunfight easily. Conserve your fire, keep AP for when T3 xenos appear.
UGL can be used to blast dead Marine corpses towards your position, situational but good during sieges or defensive actions.
UBS is an underrated tool and is my preferred underbarrel attachment, if you use a hotkey you can swap to it when ambushed by a CQC Xeno and blast/stun them.

M41A Mk1
Attach-Rec
- Bayonet / S5 RDS or S6 Reflex / UGL - The only real config for Mk1
- Alt a UBS, as above to ambush a CQC Xeno.
Essentially a Mk2 but larger magazines and less attachment options. You need to get this from requisitions. Larger magazines, and rare access to AP ammo, makes this an attractive option if you enjoy the Mk2 but want better ammo economy. The time constraint of getting this from req is the biggest drawback, you may not have the time to get it. Pick a UGL or UBS at your discretion.

M37 Shotgun
Attach-Rec:
- MagHarness / A-Grip / Bayonet - Standard Setup, Slugs or Buckshot Pref
Veteran players will swear by this weapon. High damage output in close range. Ammo is slightly easier to carry (can fit in Helmet) but still prohibitive for a Corpsman. Extremely effective at warding off Runners and Lurkers, mere presence may cause some less skilled Aliens to disengage outright. Struggles against higher-tier xenos. Prone to getting the Corpsman player too close to the fight and killed.
Buckshot for maximum damage, limited to 2 to 3 tile range. Be careful not to charge ahead with this by mistake.
Slugs are great for mid to long range stunning power, hard counter to Warrior grabbing. Lower damage output. This can be an ideal support weapon.
Flechette is stronger against T2 and T3 xenos, but it lacks any stunning power and thus is less useful for Corpsman. Flechette is best used for the MOU shotgun, which is not ideal for a Corpsman to use as it typically is paired with light armour and a finisher gun.

M4RA
Attach-Rec:
- (Support) Supp or Ext Barrel / B8 Smart Scope / Laser Sight
- (Chase) Any / Rail Light or Mag Harness / A-Grip
Higher damage per bullet but lower rate of fire. There are two strong builds for this weapon.
The “best” build (imo) for a Corpsman is a support IFF build. By using a B8 smart scope, you can provide support fire through a mob of Marines and assist in adding extra DPS to targets. You do suffer a drop-in rate of fire and slightly less damage, but your damage output is still respectable. Furthermore, thanks to the laser sight you can fire the weapon one-handed and still have a fairly good chance to hit, this can prove useful when you are dragging a marine as you can fire on attacking xenos with the other hand.
An esoteric strategy with the B8 is to pack another rail attachment in your kit (either RDS or Rail Light) and swap to it in circumstances where IFF is not useful, such as you sitting in a static frontline or you are in a run and gun solo situation. You’ll lose the IFF but regain damage and faster ROF. You can swap back to the B8 when you re-join a marine mob.
The alternative chase build is built for Marines taking light armour and hunting down out of position xenos. It’s a good choice but risky for a Corpsman who will not only lack ammo to sustain this but should not be overly exposing themselves.
If you take this, I’d suggest buying M4 armour for more mag space. Try and keep a spare AP mag for dealing with Defenders/Crushers.
The biggest drawback to this rifle is the very low ammo capacity. You will struggle in this regard due to your low storage.

M41AE2 Heavy Pulse Rifle
Attach-Rec
- Bipod / Reflex Sight
Decent weapon. Near equal damage to M41A, higher ROF. 300 rounds per mag, kit with gun grants 800 rounds, extra ammo can be scavenged from spare mags or squad req. Corpsman will have no issues with ammo management with this gun. Lack of AP ammo is a minor issue, the weapon only struggles when fighting Crushers or Defenders.
Prohibitive disadvantage is the weapon must be acquired from Requisitions only which may be time consuming to acquire, and it is not guaranteed the weapon will be in stock if you are too slow to reach requisitions. You also can only use autofire if you use a bipod to set up. Furthermore, moving and firing with the gun incurs a significant movement slowdown, plus the bipod requires the user to setup which further inhibits movement.
Watch your firing lanes, HPR users are prone to friendly fire incidents.
Mod88 Pistol
Attach-Rec
- Extended Barrel / Laser Sight / S5 Red Dot Sight
Standard issue USCM sidearm, surprisingly viable.
Main advantages of this weapon is that it’s standard issue ammo is armour piercing, making the weapon very viable against high level xenos with armour. A mag dumped Mod88, assuming all bullets hit, can leave a Ravager 1 bullet shy of being in crit.
The above suggested attachments ensure the weapon can reliably hit bullets at 7 tiles.
Furthermore, you can place the pistol holster in your armour slot, allowing you to carry six spare magazines into combat without needing to dedicate any other of your slots to carrying ammo, and pistol storage options tend to give you a greater magazine carrying capacity than regular rifle magazines.
If you take a Mod88, I’d suggest making a mod88 ammo box and throwing it in the FOB, req is unlikely to resupply you, and you can easily make a ammo box for free.
SU-6
Attach-Rec
- Extended Barrel / Laser Sight / S5 Red Dot Sight
An underrated firearm. It possesses an innate IFF function, meaning its bullets pass through allies and only strike enemies (or humans with no IFF). It features decent damage per bullet, surprisingly high armour piercing and the highest rate of fire of any firearm alongside the M4A3 pistol, limited only by how quickly you can spam the fire button.
Ammunition is however a point of concern, Requisitions is unlikely to resupply you, so you’ll need to carry all the ammo you need for the operation. Fortunately, you can buy the box-case to buy an entire’ belt’s worth of ammo for fairly cheap. I would suggest you at minimum use this pistol alongside with a pistol belt filled with ammo, plus a spare large pistol magazine belt full of ammo.
If you can setup a reload hotkey binding to quickly grab a magazine from your belt/pouch and then reload it, you’ll be able to output enough ammo to even give T2s and some T3s pause.
If nothing else the ability to kill a rogue facehugger through a crowd is indispensable.

Just because you are a healer does not mean you can’t dispense death.
Armour
Your choice of armour bears consideration as a Corpsman as your priorities for armour selection are going to be different than the average grunt. You have five choices of armour, I will detail the pros and cons of each armour for a Corpsman and allow you to determine which is to your liking.

M3-L Armor (Light)
Fastest movement speed but lowest defence. It is restricted to only carry two (2) items, which might be a big drawback for you. Favoured by aggressive Marines or those who want to run fast. If you get caught by a Lurker/Runner you are almost guaranteed to suffer broken bones.

M3 Armor (Medium)
Standard issue armour. Slightly better than Medium but you are moving slightly slower. Has 3 inventory slots and is the gold standard for armour. Good pick for most Corpsmen if you value the extra slot.

M3-EOD Armor (Heavy)
Uncommonly seen armour. Provides the best armour protection of anything most Marines can get, but you are crippled by the slowest move speed of all the armours. Still retains 3 inventory slots. Not a bad armour but the slow speed is a issue to consider.
Special Issue Armour
These armours need to be purchased from your medical vendor with points, and are quite expensive. They each provide strong benefits but at a high cost. Its up to you if the price is worth it. You can still make a strong medic loadout while affording one of these armours.

B12 Pattern Armor
Cost: 28 Medic Points
Essentially Medium+ armour. Provides slightly better protection against most attacks, retains your 3 inventory slots and average movement speed, also provides the highest level of acid protection akin to Light armour and the M4.

M4 Pattern Armor
Cost: 28 Medic Points
Same defence as Medium armour except it also has the highest acid defence alongside the L and B12 armours. The main benefit of this armour is that it provides four (4) inventory slots, instead of the usual three (3).
TL;DR
Take Medium armour for inventory. Take Light armour if you want to run fast. M4 is good if you need more inventory, B12 is a good upgrade to Medium armour, both are expensive.
Medical Items
Bold: Extremely useful, consider taking
Bolt Italic: Useless, bad or a better choice is available for Corpsmen
Italic: Item can be found elsewhere for free. Item may or may not be useful.
Normal: Item is decent, worth buying if it fits into your strategy.
Equipment Rack
All items on the Equipment Rack are free to issue, but you are limited in the amount you can take.
Back Slot: 1 only
If you have time, it’s better to get a standard USCM variant of the backpack/satchel since they will not inform the Aliens of your status as a high value target.
- Medical Backpack - Standard issue. Holds 7 large items, but you must hold it in your off-hand or drop it on the floor to take items out of. Too slow to use during high stress events. Also has a massive and obvious medical sprite making it easier to spot users. New players may find this useful but more experienced Corpsmen will want to train to use the Satchel.
- Medical Satchel - Holds 5 large items. Can take items out while it’s on your back. Superior to the backpack due to this.
Belt Slot: 1 only
- Lifesaver Bag - Holds 21 small medical items, comes equipped with an array of basic medical items. Sufficient to hold most of your high-need medications, always worth taking. Has an obvious mob sprite, but this can be obfuscated.
- Medical Storage Rig - Holds 14 small medical items. Can hold pistol ammo as well as Defibrillators and roller/medevac stretchers. Has no obvious mob sprite. Inferior due to the fact you can’t hold as much equipment, and you can generally place your defibs/stretchers in your backpack or armor/webbing. You also get less medical supplies than the Lifesaver, forcing you to buy/acquire more supplies than normal.
Pouch Slot: 2 only
- First Aid Pouch (Any) - Useless for a Corpsman, this is intended for non-Corpsman roles.
- First Responder Pouch - Can hold Roller/Stretcher Beds, pills, medical supplies and the Analyzer. Generally better pouches to pick and these items are not hard to hold elsewhere, but a good all purpose pouch.
- Sling Pouch - Decent. Can hold any large item such as a Defib or Blood Bags. Acts like a Magnetic Harness attachment, any item placed in it will automatically be grabbed and put back into the Sling.
- Medical Pouch - Holds four medical items, strictly inferior to the First Responder Pouch
- Medkit Pouch - Holds one medkit. Useful if you are pressing for slots for a medkit.
- Reagent Canister Pouch (Revival) - Pre-loaded with Epinephrine, Inaprovaline and Tricordrazine. Use on dead people before reviving for a big health boost on revive and guaranteed healing over time. Loaded with enough chems for thirty eight (38) uses. Extremely effective pick, almost a must have. Saves on Epi pens and lets you give every person you revive Epi.
- Reagent Canister Pouch (Tricord) - Loaded with over 40 uses of Tricord. A great supplemental kit, you can inject this into your patients, alongside regular healing meds, to hasten their recovery speed. Also good for minor injuries.
- Reagent Canister Pouch (Other) - Comes with either Bicard or Kelo. Over 40 uses per kit, quicker to access than pill bottles. Situationally useful.
- Mag/Shell Pouch - Situationally useful for Rifle or Shotgun users, but lose out on a Medical pouch.
Accessory Slot: 1 Only
- Webbing Vest - Fit 5 small items, great for holding most medical items. Must pick.
- Shoulder Holster - Useless, lost opportunity cost for holding medical items.
- Webbing - Holds 3 medium items. Mostly useful for holding additional gun magazines. Situationally useful if you need more ammo slots and can hold your medical items elsewhere.
- Drop Pouch - Holds multiple large items, is generally used to carry two Defibrillators. This is a strong alternative pick for Corpsman, as it saves on satchel/backpack space.**
Gear Rack
You have forty five (45) points to spend on your Gear Rack.
Field Supplies
- (2pt) Adv Burn/Brute Kit - More is always useful. But you can vend these for free in medical.
- (1pt) Medical Splints - Always needed. However you can vend and replenish these for free from medical or from any first aid vendor strewn on the Almayer.
- (1pt) Gauze/Ointment - Useless for Corpsmen.
Firstaid Kits
- (12pt) Adv Firstaid Kit - Comes with 1 Tricord Autoinjector, 3 Brute Kits, 2 Burn Kits and 1 Splint. Strictly 1:1 cost versus buying the supplies individually, but you also get the FAK to hold the supplies. Useful to buy one for the quick storage space, but if you are tight for points you can buy the individual supplies and save points.
- (5pt) Firstaid Kit - You are only buying this for the extra storage. If you are time sensitive this can be useful, but otherwise it’s a luxury. Empty FAKs can be found in Medical.
- (6pt) Other Firstaid Kits - Too situational or the supplies are not good enough. You can get empty and full versions for free in Medical or hidden around the Almayer.
Autoinjectors
- (2pt) Epinephrine - Useful for hard to revive bodies. If you are being very conservative with it you can generally get away with the free Epi you get with a Lifesaver bag. But if you like to use Epi for all your revives, get the revival canister.
- (2pt) Oxycodone - Extreme painkiller, great for ignoring high level pain. Using it on yourself or a high value Marine can be lifesaving. But you can generally get more easily from Medical if you really need it. You get one for free with the Lifesaver belt.
- (1pt) Others - Regular injectors are situational to use, some Corpsmen swear by them. Their extreme cheap price and instant injection are strong points worth considering.
Pill Bottles
- (5pt) Bicard/Kelo/Tram - You almost always want to get one of each of these in addition to the free ones you get with your Lifesaver bags. By itself that’s enough to heal 32 Marines, 48 if you get the stronger custom variant from Chemistry.
- (5pt) Dex/Dylo/Peri/Inap - You get one of each for free from your Lifesaver belt. Rarely need to use more than the default amount. All are useful to have though.
Medical Utilities
- (4p) Health Analyzer - Issued for free.
- (4p) Medical HUD - Issued for free.
- (4p) Roller Bed - Issued for free. More can be acquired easily from medical. Very useful to have to quickly move bodies.
- (6p) Stasis Bag - Issued for free. More can be acquired from medical.
- (3p) Regent Canister (Empty) - Rarely needed. Can be acquired for free from medical.
- (15p) General Utility Pouch - Useless for Corpsmen, takes up the belt slot for 3 large object holding slots. Lose out on Lifesaver Belt.
- (6p) MS-11 Refill Tank - Situationally useful for Corpsmen using Injectors, can be filled with a single chemical such as Epiniphrine or Oxycodne and used to refill a autoinjector or hypospray in the field.
Explosives
- Almost never worth buying, high cost, acquire grenades from Requisitions.
Ammo
- You get very good value per purchase for special issue magazines compared to most other roles. Six points for an Extended or AP M41A magazine as a example. If you find yourself with nothing else to buy, you can buy excess ammunition.
Restricted Firearms
- (8p) VP78 Pistol - Stronger pistol, if you are very robust and can land your shots you can make it work, but ammo can be hard to get in the field.
- (16p)SU-6 Smart Pistol - Lower damage output. But lets you fire through your squaddies thanks to IFF. A support pistol but ammo is hard to get.
Utilities
Most items here are luxuries by definition, main items worth mentioning.
- (6p) Large Magazine Pouch - Hold 4 mags. Great for M41A/M4RA/SMG users. Useless for Shotgun or M41AE2 users. Opportunity cost due to using up a valuable pouch slot.
- (6p) Large Shotgun Shell Pouch - Holds 7 handfuls of shells. Not as critically important, you gain less benefit than the Large Mag Pouch, and can generally be skipped for the free Shell Pouch
- (3p) Portable Fire Extinguisher - Extremely useful, however you can get free portable and large versions from Medical.
Radio Keys
- (3p) JTAC - Provides access to JTAC channel. This can let you directly contact Pilot Officers to specifically request the status of medevac. Some Pilots are not attentive to the Medical comms channel so being able to communicate to them directly through JTAC can be very useful.
Equipment
Standard and uncommon issue equipment used by Corpsmen
- Defibrillator: Revives dead humans, battery holds power for 15 uses, the defibrilator’s light will go yellow when 5 charges remain. Can be recharged. Try to carry two of these. Additional defibs can be acquired from medbay for free.
- Health Analyzer: Scans a target telling you their health status, standard issue. Consider bringing a spare in-case you lose one.
- Healthmate Hud: Visualizes the amount of health all humans have and their defib status. Standard issue.
- Stasis Bag: Placing a human inside this will slow larva growth, halt further effects of blood loss and internal bleeding, slows metabolism of chemicals and progression of organ damage. You only need 1 and rarely need to use more.
- Roller Bed: Used to move patients across the battlefield far quicker than dragging them can, also helps perform surgeries with a slightly better chance of success. Standard issue, consider grabbing a second in-case you lose it.
- Med Evac Stretcher: Used to transport a human to an in-flight Dropship, useful for evacuating critically wounded or infected Marines, or as a desperate method to evacuate someone from an area about to be overrun. Must be activated in an open area, will not work underground.
- Blood Bag: Portable blood dispensing unit. Click a Marine to attach an IV line which will slowly give them blood, two are provided as standard issue and all Corpsman issued bags come with universal blood that works on all humans. Click the Marine to detach the IV line when finished.
Kits
- Brute/Burn Kit: Standard issue healing item. Will heal 12 points of health on application and will provide further healing over time. Corpsmen apply these kits instantly. Brute kits will also heal any bleeding wounds.
- Splints: Used to stabilize a fracture. A splinted fracture will no longer harm the patient, a splinted leg/foot will give the patient most of their mobility back. Splints are very vulnerable to being torn off if the limb suffers any form of damage. Can be self-applied but doing so takes a very long period of time.
- Surgical Line/Synth-Graft: Standard issue special kits given to all Corpsmen. Will heal either brute or burn damage. Will apply healing over time, every few seconds it will heal 10 damage. It can only heal up to half the damage on an affected limb (if 100 damage, can only heal up to 50). Slow application time compared to brute/burn kits, but infinite usage.
Medications & Chemicals
The following is a list of all standard issue medications that are issued to Corpsmen. Assuming you select a Lifesaver bag you will get a selection of all these mediations in some form.
These medications often come in both pill and liquid form, with liquid medications typically being administered via an injector, a form of primitive hypospray for the SS13 veterans.
Some medications can only be used in either liquid or pill form, but unless noted otherwise assume a medication is issued in pill form primarily.
- Bicaridine: Heals Brute damage.
- Kelotane: Heals Burn damage
- Tricordazine: Heals Brute and Burn damage, slower to heal. Common issue medication for non-Corpsmen so be wary of an OD. This is a good medication to give someone alongside Bicarid/Kelo to speed up their health recovery.
- Tramadol: Provides moderate amounts of pain relief. Sufficiently strong enough to allow Corpsmen to perform Internal Bleeding repair surgery. Common issue medication for non-Corpsmen!
- Oxycodone: Provides very high amounts of pain relief. Issued to Corpsmen in liquid-injector form.
- Inaprovaline: Stops further accumulation of Oxygen damage while in critical health state. Does not heal Oxygen damage. Good to give to a patient who is in hard crit.
- Dexalin: Heals Oxygen damage. It will not fix the cause of the oxygen damage.
- Dexalin+: Instantly removes all Oxygen damage. Typically issued in liquid-injector form. Can be custom made into pill forms, pill version takes longer to trigger the healing effect but has the same outcome.
- Dylovene: Heals Toxin damage.
- Peridaxon: Prevents negative effects of organ damage, does not heal it. Give this to someone who is suffering a damaged heart/lung so they have time to evacuate themselves, or stand and fight a bit longer.
- Epinephrine: Increases amount of damage healed when defibrillating, further information below. 1 unit consumed per defibrillation attempt. No usage for living humans.
Non-standard Chemicals
This is a list of medications that are not standard issue. They are either unique, specially acquired, superseded by another chemical or are otherwise just not seen often.
- Paracetamol: Weak painkiller. Has a very high overdose threshold of 60 units allowing someone to consume a large amount without consequence. Unique property that Tramadol is a recipe component of Paracetamol, meaning that a Tramadol overdose can be fixed by feeding a Marine the other chemical components to create Paracetamol which will consume the overdosing Tramadol. Ergo the custom medication NitrogenWater (NW).
- Thwei: Chemical used by Predators to heal themselves. This chemical heals virtually every possible negative ailment and condition a human can have, including damaged organs, fractures and blood loss. Don’t expect to find this.
- Researcher Chemicals: Special chemicals that the Medical Researcher can create. Their properties can range from killing your organs to healing all your broken bones. If these are issued the Researcher will generally go to great efforts to explain what the chemical does. Rare to find these however. Be wary of consumption in-case the Researcher missed a negative effect.
Custom Chemicals
Medical has a chemistry department, which 99% of the time some Nurses, Doctors or Synthetic will man at the start of the operation to create custom chemicals for Corpsmen. These chemicals are typically a combination of several chemicals, some of which are unique, that provide a stronger healing effect than the standard issue chemicals.
Most of these chemicals are, in my opinion, luxuries which are good to have but not essential, there is however one medication I believe is mandatory to get.
Mandatory Custom Chemical
- ImiAlky (IA): Heals Eye and Brain damage. The only way to heal these organs without going topside for surgery. These injuries are surprisingly common during a battle. Forcing a Marine to retreat to the FOB, or the Almayer, for eye surgery is a massive waste of time. A Marine will simply tell you they are going blind and you can give them a pill and send them back to the front.
Optional Custom Chemicals
- MeraBica (MB): Heals Brute damage. Combines Bicaridine with Meralyne to heal brute damage rapidly.
- KeloDerm (KD): Heals Burn damage. Combines Keloderm with Dermaline to heal burn damage rapidly.
- NitrogenWater (NW): Converts Tramadol to Paracetamol. Only useful if someone has overdosed on Tramadol, which is extremely fatal. See the ‘Overdose’ section below for more information.
- ATD: Heals toxin damage. Extremely potent, is capable of outhealing damage from Tramadol overdoses. Very rare to see in use however.
- Iron (Fe): Iron, if combined with nutrients (via making a Marine eat food) will help them regenerate blood. Situationally useful but was nerfed recently in lieu of portable Blood Bags.
- Dexalin Plus (D+): Will instantly clear all oxygen damage sustained. Slower to metabolize than the injectors. Will not heal the cause of the oxygen damage. Useful for getting wounded Marines back on their feet faster.
To get these chems, very politely ask the person manning the chemical line what you want when it is your turn to be served, preferably with an abbreviation
Example: “Can I please get IA and NW?”
The chem line is typically slow to move and full of Medics so bring an audio book.
Unique Non-Corpsman Items
As a corpsman there are some rare items you may want to keep an eye open for, you’ll likely have to either scavenge these from permanently deceased Marines, or hope you are gifted them.

Radio Backpack
Functionally a satchel that has a inbuilt telephone for communicating with CIC/other Radio users in situations where communications is down, this can be a strong ability as you can update command with the ground situation from a medical perspective. As a Corpsman you can not purchase this from your vendor, but you may find one in your squad prep room if you are fast, or request one from requisitions. There is no reason not to take this (if you are using a satchel to start with) but finding it is not guaranteed. Its also good at hiding your Corpsman status.


IMP Backpack/Sniper’s Smock/Rocket Bags
Unique backpacks that hold 7 large items but can be accessed akin to a satchel, meaning you don’t need to take it off your back to access it. The Sniper and Rocket bags are Specialist only but on rare occasions they may either have a spare bag they’ll give away, or they won’t use it. The IMP backpack is typically only seen in the hands of a Synthetic or a Intelligence Officer, but if they permanently die why not help yourself?

M2 Night Vision Optics
Grants complete night vision. Very few Marine roles get access to it, if they should die you might find it useful, especially in scanning distant areas for deceased Marines. However a more combat oriented Marine may find this more useful than you.
Binoculars
Let’s you peer into the distance. This is a surprisingly strong item as it can allow you to scan the area head to look for critical or dead marines to recover. It can also be useful to spy ahead for any possible threats. You can get some from the squad prep vendors or ask req. Usually req has a large surplus to share.
Healing Process
Healing
Your objectives as a Corpsman is simple. Heal your patient as quickly as possible, get them on their feet and move on to the next one. The faster your patient is back on their feet, the better odds the Marines will win.
Always remain with your patient until you have completed the healing steps. It’s better for one Marine to be healed than two Marines to be partially healed.
NEVER double team another Corpsman’s patient
Unless they ask for help. Multiple Corpsman healing one person increases the odds of an accidental drug overdose. If you do help another Corpsman, it’s recommended you loudly state what you are doing, and only administer kits, sutures/grafts or splints and not medications.
Healing Process
In most circumstances, your order of attending to someone should be:
Kits > Pills > Splints > Suture/Graft
 >
>  >
>  >
> 
Burn or Brute Kits to stop bleeding and heal a large amount of damage at once. Pills, either Bicard or Kelotane, to start the healing process for any remaining damage, as well as Tramadol for pain management if they have high damage or burns, Inaprovaline should be given if the patient is in hard crit to half oxygen loss. Splints to cover any fractures. Finally you can Suture/Graft any remaining wounds to further accelerate the healing process, though this is a tertiary task and can be skipped if the patient is mostly healed or other, more wounded, patients are present.
If you are in a low risk environment with only a single patient, you can substitute your Kits with the Suture/Graft to save the Kits for later.
Wounded

A wounded patient is someone who is still alive and able to walk under their own power. These patients should be your lowest priority to heal. Most competent Riflemen can self-attend to their own minor injuries. You will want to splint their fractures once you are free to do so, as you will do it significantly faster than they can to themselves. But in a pinch you can throw a spare splint and make them do it themselves if you are busy.
Dying

Someone who has fallen into hard-crit. Will slowly die without medical intervention and can not heal themselves. Can generally be brought back to combat status quickly. Kits and Pills will work quickly on them. During high intensity combat situations, these can be high priority targets as they can quickly get back into the fight. Remember to give them Tramadol or Oxycodone.
If you have no time to heal the dying, consider quickly giving them an Inaprovaline and the appropriate healing chem, either Bicard or Kelo, this will at minimum keep them alive and slowly heal them while you are preoccupied.
BONUS KNOWLEDGE: When someone is dying, their health bar will rapidly be flashing. If the person is a few seconds from dying however, the bar will stop flashing.
Use this to know when you have the time to drag someone to safety and administer healing, or to if you need to immediately jab them with some Dexaline+ or Inaprovaline.
Dead

Someone who has died. An icon on the left side of the body will denote how long you have to revive them. These patients should be your first priority to attend outside of extenuating circumstances.
Revive
Once someone has died, you have 5 minutes to revive them before they become permanently unrevivable. Anyone can perform CPR on a dead human to extend their revive time by up to 2 additional minutes. If someone is on the verge of permanent death, get some Rifleman to perform CPR to give you time to work.
A dead human can only be revived if their overall health is less than -100 health. This can be denoted on your analyser. If you revive someone above this threshold, the defibrillator will fail, but heal a small amount of health. All Oxygen damage is instantly healed on the patient being revived, thus Oxygen damage is typically not counted as damage by the Analyzer towards their overall health status.
All chemicals inside a dead person’s body will not process until the person is revived and is stable. The only chemical that will affect a dead body on a defib attempt is Epinephrine.

You’re not a Corpsman until your knee deep in the dead
Epinephrine and Revival Damage Healing
Whenever a human is defibrillated, whether successful or not, the body will be healed for a small amount of damage.
If the body had no Epinephrine inside of it, then the amount healed will be
- 12 health + 4 Brute and 4 Burn damage
For a maximum of twenty (20) points of healing.
However if the body has at least 1 unit of Epinephrine in it, it will heal for a larger amount of.
- 12 health + 16 Brute and 16 Burn
For a maximum forty four (44) points of healing, a significantly larger amount of health.
If you have access to it, then it is almost always worthwhile to inject Epinephrine inside of a dead Marine, even someone with less than -100 health benefits from Epinephrine as they will heal faster thanks to the larger amount of healing received.
WARNING: A successful defib will cause a small amount of organ damage to the patient, and a failed defib has a 25% chance to inflict organ damage to the heart. Try to avoid performing excessive defibs. You can heal the dead patient until their health is below -100, though in extreme cases you may need to get creative as discussed below.
 Recently Deceased: Aprox ~5 minutes until permanent death
 Close To Death: Aprox ~2 minutes until permanent death
 Death’s Door: Aprox <1 minute until permanent death
 Unrevivable: Dead for too long, can not be revived.
 Do Not Revive: Player has either disconnected, spawned into a new human/xeno or does not wish to be revived. The body can still be revived, but no one will be in control. NOTE: THE DEAD PLAYER CAN UNDO THIS STATUS WHILE THE BODY IS REVIVABLE!
Revive Order
The order of who you chose to revive is critically important. Sadly, some roles are more important than others. As a general rule of thumb, the below list is the order you should prioritize who to revive.
Medics > Squad Leaders > Specialists > Smart Gunners > Eng/FTL/Other > Rifleman > Civilians
Medics are typically the first you should revive, as they can quickly heal themselves and start healing other patients once revived. Afterwards you want to start reviving the roles that give the greater impact on the ground in the above noted order.
ONE CRITICAL EXCEPTION to this if you see someone on the verge of being rendered permanently dead. In which case you may want to revive them first, even if there is someone more important.
Extreme Revive Damage
Usually most patients can be easily revived once in cover. However in rare cases you may get a patient who has suffered an extreme amount of damage, typically 300 to over 800 damage. This usually only occurs to people who were exposed to incendiary or acid attacks, have had their corpse struck by a large amount of explosives, or suffered an extreme amount of high damaging friendly fire attacks just prior to death. People without armor are more prone to this overkill.
YOU CAN REVIVE SOMEONE WHO HAS SUSTAINED OVER EIGHT HUNDRED (800) DAMAGE IF GIVEN TIME!
Do not fret, as patients with such high damage can be revived. To give yourself the best revival odds, you must:
- Use Brute/Burn kits on every single damaged limb, no matter how much damage each has suffered.
- Administer Epinephrine or administer a Revival Injection (which contains Epi, Inaprovaline and Tricordrazine). Epinephrine will increase the amount of damage healed through defibrillation
- Suture/Graft every damaged limb of the patient.
- If you reduce patient damage below -100, immediately begin defibrillation.
- If you cannot reduce damage below -100, start defibrillation once you have Sutured/Grafted every limb. Every defib attempt will remove a large chunk of damage thanks to the Epinephrine. Each defib attempt will consume 1 unit of Epinephrine, apply more if it is used up.
- Once revived, administer chemicals as needed and splint fractures. If you were forced to perform multiple defibrillations, consider medical evacuation for heart damage repair if Oxygen damage starts to build up.
- (Optional): Conscript someone to perform CPR to extend patients’ revive timeframe, especially if the patient is close to permanent death.
Never give up on a Marine.

I can fix him.
Field Surgery
As a Medic, you are authorized and trained to perform Level 1 Surgical operations. Realistically the only surgery you will perform is to fix Internal Bleeding. You cannot perform any more complex surgery such as fracture/organ repair or larva removal.
Due to your lower standard of training, and the horrid conditions of field surgery, you will be slower than a Doctor or Synthetic, and more prone to making an error.
To give yourself the best chance of success, ensure you give your patient a strong painkiller (Tramadol is the go-to, Oxycodone is best but typically overkill for IB repair). Then place them on a Roller Bed to immobilize them, though IB surgery can be performed while standing but this is riskier.
Internal Bleeding
Your health analyser will tell you if a patient has internal bleeding and its location.

If you lack an analyser, you can also check for the location of internal bleeding by right clicking the patient and selecting ‘Check Status’, this will reveal the location of all internal bleeding location (XX limb looks bloated and discoloured)

At this point you will want to administer Tramadol to the patient, then remove any armour in the way, grab your surgical equipment, select the affected limb, and click away. Ensure you are on Help intent and have surgery mode on (which is on by default). It is recommended you place the patient on a roller bed to increase success chance The button for surgery mode should be on your upper left HUD.
Standard Method
Safe method, lowest chance of error occurring.
Scalpel > Hemostat > Retractor > Surgical Line > Surgical Line
 >
>  >
>  > >
> >
Improvised Method
Slightly faster method, more bleeding/error prone.
Scalpel > Scalpel > Surgical Line > Surgical Line
> > >
UNGA Method
Least inventory heavy option. Highest chance of error occurring.
Knife > Knife > Surgical Line > Surgical Line
 > > >
> > >
Hobo Method
Desperate times call for desperate methods.
Knife > Knife > Cable Coil > Lighter
> >  >
> 
Assuming ideal working conditions and good coordination, the the improvised or UNGA method of surgery will save you about 3 to 10 seconds of working time compared to using the proper surgical tools you are issued. However these improvised tools and methods are more prone to failure if you do not set the right conditions (painkillers, working bench). It’s also less professional looking, do not let the Combat Reporter see you lest you appear on the galactic news for your barbarity.
Overdose
An overdose occurs when too much of a medication is given to a patient. Most overdoses of the usual chems that appear on the battlefield are easily managed, with the exception of Tramadol which is highly lethal and often fatal. The greatest sources of an overdose are Corpsman double-teaming and giving too many meds, a Corpsman not checking their analyser before giving chems that are already present, and Marines giving themselves too many chems by accident.
Be especially careful of absentminded Riflemen who are self-administering healing chemicals while you are healing them.
There are two overdose thresholds, in-code this is referred to as an ‘Overdose’ and a ‘Critical Overdose’. An overdose occurs when you reach the OD threshold, a critical overdose occurs when you reach an even higher threshold, usually slightly around double the OD threshold (if Bicarid is 30u a crit OD would be around 50u). A critical overdose results in far more damage being dealt to a patient.
Common overdoses and their treatment are.
BICARID | OD 30u | CAUSES: Burn damage | LOW RISK OD
Treat with Kelotane or Tricord
KELOTANE | OD 30u | CAUSES: Brute damage | LOW RISK OD
Treat with Bicaridine or Tricord
TRICORDRAZINE | OD 30u | CAUSES: Brute, Burn, Toxin, Eye damage | MEDIUM RISK OD
Treat with Bicarid/Kelo/Dylo and ImiAlky.
DEXALINE | OD 30u | CAUSES: Toxin damage | LOW RISK OD
Treat with Dylo
TRAMADOL | OD 30u | CAUSES: Toxin damage | HIGH RISK OD
Extreamly dangerous and common OD. Treat with Dylo and Tricord.
This is only viable if OD amount is low (<40u) as treatment will only slow toxin build-up, not reverse it. If OD amount is high consider medevac or return to FOB for dialysis.
NitrogenWater (NW) will convert the Tramadol to Paracetamol, which has a higher OD threshold of 60u. Be warned that Tram and Para are toxic when together.
Medevac

The Medical Evac Stretcher, which you are issued for free, allows you to send a Marine to a dropship that is currently flying above the battlefield through the Medevac system.
In order to use this, you must coordinate with a Pilot Officer who is flying either of the two dropships, you can contact the PO through your medical channel, optionally you can contact them through the JTAC channel if you have access. Make sure to get the PO to affirm their intent to assist as it may take time for them to get in the air.
In order to evacuate a patient, you must buckle them into the stretcher, this will automatically activate the stretcher, so you don’t need to do anything else to the patient. The stretcher will only work if it is placed in a “open” tile, or at least one where the ceiling is “made of glass”, thus you can not evac someone in the caves, you can examine a tile to determine what the ceiling is made of. Once this is done, you need to signal to the pilot to bring up the patient. The medevac system on a dropship can only evacuate one patient at a time, with a cooldown of sixty seconds per patient. This means realistically they can evacuate two patients per air run. If there are multiple people being medevacked you may have to wait.
This system should be reserved to evacuate someone who has been infected by a larva, or someone who has suffered significant organ damage. Generally this should be done if the person cannot be taken back to the FoB.
Situationally you can also use this as a desperate measure to evacuate someone from a hopeless situation, such as if you are about to be overrun by the enemy. At least someone might escape?
Healing without a Analyzer
There is no reason to operate without a handheld Analyzer, however circumstances may result in you losing your Analyzer. Knocked unconscious, explosion, someone else lost theirs and you give them yours, thus it’s a good idea to bring a spare if you can. If this is not possible, you can still operate as a Corpsman without a scanner.
Without a scanner you will only be able to glean basic information regarding the health status of your patient, so let’s discuss the process.
Assess Overall Health: Your HealthMate HUD will still tell you their overall health, you can still assess how hurt someone is so you can judge what intervention you need.
Brute Damage: You cannot discern large concentrations of brute damage, but if the patient is bleeding, examining them will reveal the location of the bleed, which you can then apply a Brute Kit. Brute damage has a chance to spread to adjacent limbs, so if you notice a bleeding wound on the patient’s hand, consider applying a Brute Kit to the hand and arm.
You will want to ‘Check Status’ of your patient to ensure they are not suffering any internal bleeding, as discussed above.
Administer Bicard and Tramadol to begin the healing process.
Burn Damage: You cannot discern the location of any burn injuries. Ask the patient if they have been stuck by incendiary or acid attacks, if so apply Kelotane.
Xenomorphs with ranged acid attacks will generally aim for a Marine’s chest, as this gives them their best chance to hit. Ergo it is best to apply Burn kits to a Marines chest and groin. If you can’t find the correct part to heal, simply apply the burn kit to all limbs until the game tells you that you have patched up a burn.
If the patient was struck by a fire attack, their burns are likely spread across their entire body, apply Burn kits liberally, however Kelotane may be more useful for healing spread out burn damage.
If the patient has suffered relatively low damage on your HUD, but they are seemingly falling unconscious, they may be in a lot of pain due to burns, administer Tramadol. They could also be experiencing organ damage and thus Oxygen damage however.
Toxin Damage: The only sign will be the patient vomiting. Likely caused by organ damage or Tramadol overdose. Apply medications as needed.
Oxygen Damage: Patient falling unconscious without any obvious signs of trauma, likely organ failure. Administer Inaprovaline and consider medivac.
Fracture: You have no way of telling if someone has a fracture, but the patient will know. Ask them if they have a fracture and they will tell you.
You will want to make it a priority to find a new analyser as soon as practical.
Non-Human Information
Non-Human Information
99% of the individuals you attend to will be fellow humans, but on rare occasions you may have to contend with non-human healing. This is a quick overview of what to expect.
Synthetic/Working Joe


The most likely non-human you may be asked to attend to. Synthetics are mostly comparable to humans in terms of damage and healing, they can not suffer fractures, broken organs, blood loss or pain. They are also more durable than an average human, though they don’t benefit from being able to wear combat armour. Synthetics also can not be placed into critical status, meaning they effectively have double the health of a human, all combined this means that a Synthetic is harder to kill than a human.
If a Synthetic is killed they can be revived with a defibrillator like a human, they also do not have a defib timer, meaning they can be revived after an unlimited amount of time. However their injuries can only be attended to with engineering tools. A welding tool for any brute damage, and cable coils for any burn damage. If you lack access to these tools you will need to find a ComTech to assist.
Predator/Yautja
Hyper aggressive humanoid species that tend to hunt humans and xenomorphs alike. Its virtually impossible that you’ll find one of these consenting to having a human heal them. The only likely circumstance you’ll find yourself attending to one of these is if it is dead or has been critically wounded and you are ordered to stabilize it once it has been captured.
Functionally speaking they work identically to humans in terms of health concepts, and can be healed akin to a regular human, with two critical differences.
- They don’t have human blood, any bloodless needs to be healed with Yautja blood from an alternative source, you may want to start getting a supply.
- Your medical analyser won’t work on them, you’ll need to work without one.
Xenomorph
The only time you may even contemplate healing a xenomorph is if you have an allied hive grown by your Research department.
While Xenomorphs do have a health state like humans, that is where the similarities end as xenomorphs suffer none of the negative health effects any humanoid suffers from. Furthermore the only way a xenomorph can heal is if it is dragged onto a tile with weed on it (weed that is affiliated with the hive, a ‘Greeno’ xenomorph dragged onto weed belonging to the hostile hive won’t heal the Greeno).
However, humans can not drag xenomorphs under any circumstance, although Synthetics can. In the very unlikely event you find a xenomorph that is allied, and it is in critical, then you’ll either need to find a Synthetic to drag it, or find another allied xenomorph to drag it or plant weeds under it.
Survival Strategy/Healing Strategy
Strategy

Survival is a concept that is hard to teach, it is something you will pick up over the dozen and hundreds of hours you will play. I’d recommend playing as a Rifleman to gain better frontline survival tips, as a Corpsman is generally a very conservative and withdrawn creature.
General Survival
Surviving as a Corpsman is simple. Don’t lead from the front. As I wrote prior, a dead Corpsman is a useless Corpsman, you should be the last person to die, not the first.
More than most other roles you want to be acutely aware of where you are standing compared to the rest of the Marines. Ideally you want to be in the middle to rear of the death ball, not too far forward to be targeted, but not too far back to not see what is going on up front.
Generally you want to be patrolling the centre of the fight and keeping your eyes open for any Marines that need a hand. Someone who just got hit by a ton of acid, or stunned and knocked down, or stuck by friendly fire.
In-between the fight you can swap out your gun and contribute in whatever fashion you can with the gun you selected. IFF fire? Slug stun rounds against Xenos? Suppressive fire at an exposed alien?
Unless someone is stunned or dying, you generally want to let the wounded come to you. Dashing forward into the frontline to grab the dying or dead Marine is commendable, but leaves you vulnerable to that hidden Warrior waiting around the corner. Usually at least one Rifleman will try to grab and drag back a wounded or dead Marine towards you.

Your moment of glory can come if the Queen comes out screeching. If you are far back enough you can immediately rush forward and either start firing at the Queen to force a retreat, or start shaking up stunned Marines to get them back into the fight much faster.
Healing Strategy
As a corpsman it’s easy to become hyper focused on your healing task at the expense of all else. If at all possible, make it a priority to drag your patient backwards into a safe zone before you start healing.
Always remember to secure the dropped gun of the Marine you are reviving whenever possible and safe to do, nothing’s worse than losing your gun or armour.
Check what other drugs are in a patient before giving them something, many Riflemen carry Tramadol and Tricordrazine as standard issue, and a Tramadol overdose can be quickly fatal.
When defibrillating, you can freely drop the defib on the ground and/or use your other hands to perform most other tasks. You can choose to defib someone and then start feeding them pills while the defib is charging.
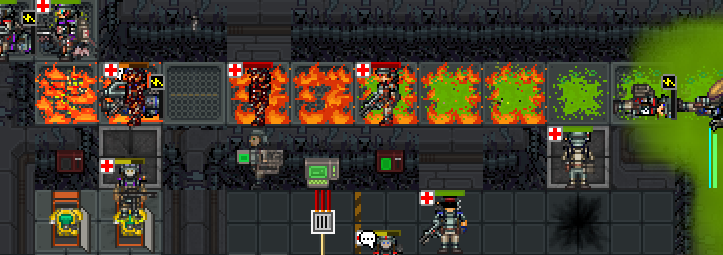
Loadout
Loadout

One man/woman medbay.
If you ask one hundred Medic players what their loadout is, you will get one hundred different answers.
The image above is a rough visualization of one of my general Corpsman loadout, and is in the “ideal” position of being fully kitted, which may not may not be possible depending on your circumstances.
I highly encourage each Corpsman to work on their own loadout, you will come to discover what you prefer and how you want your loadout to be set up. Copying someone else’s loadout can be useful in a pinch, but doing so will ignore the processes of healing that player goes through when setting up their loadout, or dispensing healing in the field.
When designing your loadout, you should ensure that it is prepared to handle the following events.
- Can you fully splint one (1) Marine and all their limbs? What about five (5) Marines?
- Do you have enough supplies to revive someone with 800 damage?
- Can you fix someone’s Internal Bleeding?
- Can you deal with someone who overdosed on Tramadol? Can you fix Toxin damage?
- Can you ward off a flanking Xenomorph?
- Can you fix someone who has lost a lot of blood?
- Can you send someone who is suffering severe organ damage back to the Almayer?
Can you fix Eye or Brain damage yourself? - Can you quickly move someone from point A to B? What about if you are in the middle of a general retreat? What if you are alone?
- Do you have quick access to a defibrillator? What happens if the defib is lost or runs out of battery?
I Literally Just Spawned In And Need A Kit Pronto
A quick setup guide if you need a good kit with little prep time. In spite of its simplicity this kit can sustain you for a surprising amount of time.
- Go to your Medical Equipment Rack, get your standard Marine kit, Medium or Light armour, Satchel, a Lifesaver Bag, Revival Reagent Canister Pouch and a Shotgun Shell Pouch or Magazine Pouch based on weapon choice. Also get a Webbing Vest.
- Get your ‘Essential Medical Set’. Place the Defibrillator in your backpack, your Analyzer in your Lifesaver bag. Put the roller bed, medvac stretcher, surgical and synth-graft and surgical case in your webbing, put the stasis bag and two blood bags in your armour.
- Grab the free Advance First Aid Kit, buy two more Adv-FAKs and stuff them in your satchel. Empty the Tricord injectors and buy three more splints and put them in their place.
- Buy one Bicard, one Kelotane and one Tramadol pill bottle and put it in your lifesaver bag.
- Grab a weapon of choice. Either a Shotgun with Slug/Buckshot or a M41A, preferance with AP or extended standard rounds.
That’s it, you have a functional loadout, if not basic. For optional actions you can.
- Go to Medical, grab an extra Defibrillator and put it in your satchel.
- Get in the chem line, ask for ImiAlky (IA), if the line is not busy consider asking for MB, KD and/or NW.
- Take out one blood bag, make a free slot in your A-FAK and put it there. Put a portable Fire Extinguisher in your armour slot, safety off.
- See if you can convince an Engineer buddy, and the Medical department/Command, to hack a Wey-Med vend machine so you can get even more useful medical supplies. Bonus points if you get it dragged onto the dropship.
- Fill your helmet slots with free Tricord or Oxycodone injectors for yourself.
- Organize your A-FAKs to separate the Brute/Burn/Splints into separate boxes.
- If you have free time, try replacing your Medic clothing with Standard Riflemen clothing to disguise yourself
That’s it, you should have more than enough supplies for a long drawn out battle.
Conclusion
Conclusion
Practice makes permanent. You gain experience by playing the role, but I hope this guide will give you a solid foundation to work upon and improve your skills.
Corpsmen are one of the oft unappreciated and overworked backbones of the Marine force. Every single role in the Marine force is critical to its success, but those guns and barricades cannot be armed without healthy men and women who can stand on their own two feet.
Have fun, and remember to take a break from Corpsman every once in a while.
Every Medic main is a temporarily embarrassed Specialist main.
Changelog
Changelog
17/05/23 - Added new tips, expanded thoughts on chemicals, noted Marines about to die have their HUD stop flashing red
25/05/23 - Fractures now cause IB, minor tidy up.
03/06/23 - Tidy up. New info regarding special equipment.
05/06/23 - Starting to add new images. More misc info about equipment. My thoughts on armour.
14/06/23 - Medevac expansion, minor new notes
26/06/23 - More cleanup. Added section on non-humans.
06/08/23 - Expanded on Overdose section
04/07/24 - Tidy up and new thoughts in the first half of the guide
27/09/24 - More tidy up